Oh, friends, gather ’round! There are some recipes that just hit different, aren’t there? Those nostalgic treats that instantly transport you back to childhood bake sales, cozy afternoons with a good book, or even just that pure joy of licking the batter spoon clean. For me, that feeling is wrapped up perfectly in a rich, chocolatey brownie. But not just any brownie – we’re talking about a brownie that takes pure bliss to a whole new, elevated level: Marshmallow Brownies!
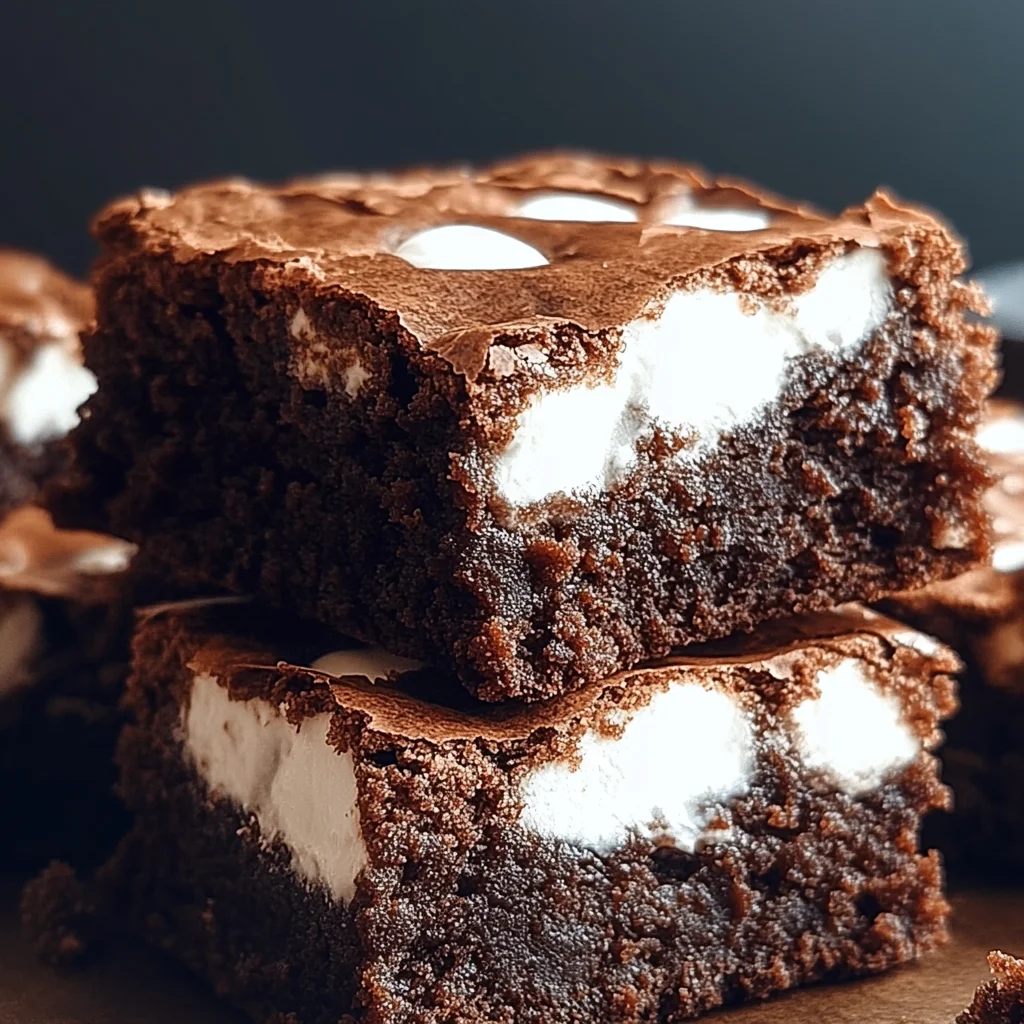
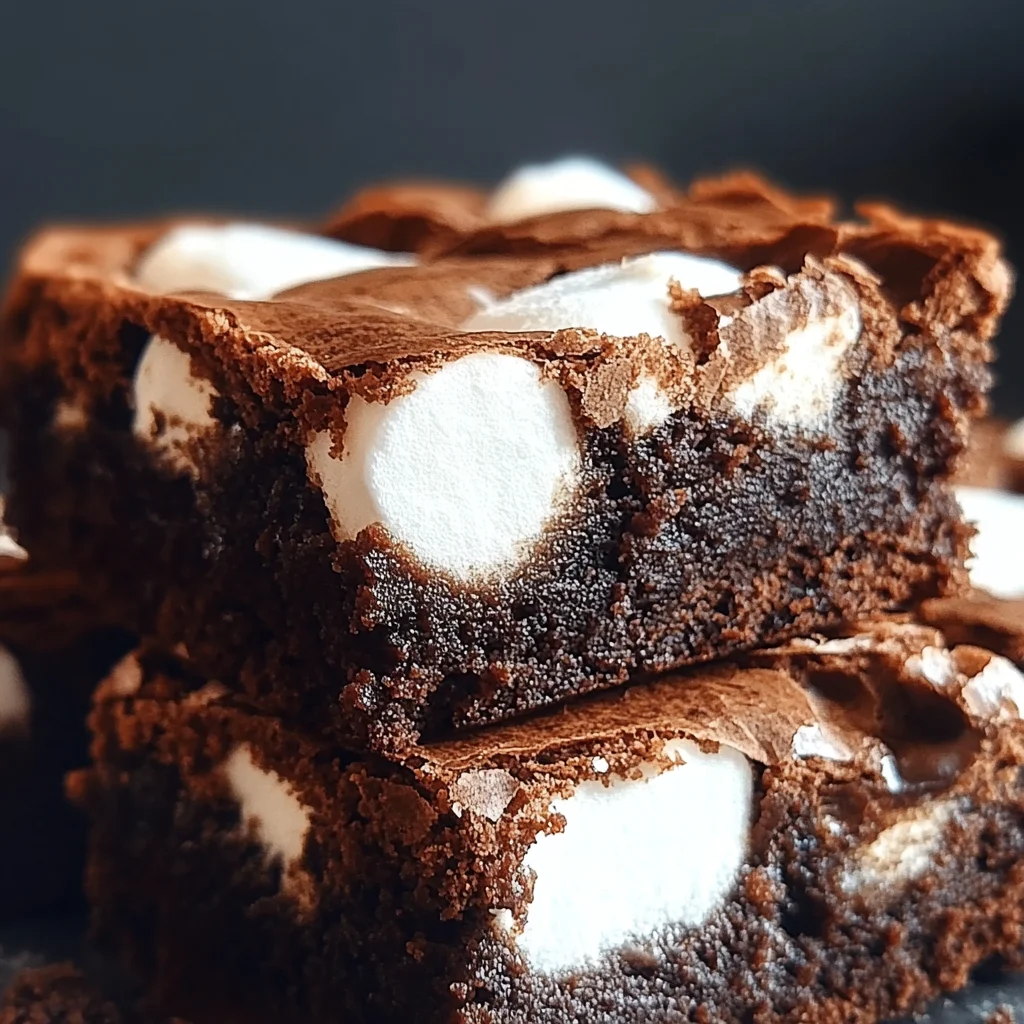
This isn’t just a dessert; it’s an experience. Imagine sinking your teeth into a perfectly fudgy, intense chocolate brownie, only to be met with pockets of sweet, gooey, melted marshmallow. It’s a texture and flavor combo that’s truly unforgettable. The best part? This recipe is unbelievably easy, quick to whip up, and yields results that look like you spent hours slaving away, when in reality, it’s pure magic!
Why You’ll Love Marshmallow Brownies
- Fast: From mixing bowl to oven in no time, making them perfect for last-minute cravings or unexpected guests.
- Easy: Simple ingredients and straightforward steps mean anyone can master these decadent delights.
- Giftable: Box them up for a homemade gift that everyone will adore – they travel beautifully!
- Crowd-pleasing: A guaranteed hit at any potluck, party, or family gathering. Who can resist fudgy chocolate and gooey marshmallow?
Ingredients
Get ready to gather your pantry staples! Here’s what you’ll need for these utterly dreamy brownies:
- 2 cups granulated sugar: Our base for that perfect sweetness and chewy texture.
- 3 large eggs + 1 egg yolk: The secret to that incredibly fudgy, dense brownie texture. Don’t skip that extra yolk!
- 1/2 cup unsalted butter, melted: Adds richness and helps create a moist crumb.
- 2 tsp pure vanilla extract: A must-have flavor enhancer that truly makes the chocolate sing.
- 1/2 cup oil (canola or vegetable): Contributes to the moistness and chewiness of your brownies, keeping them fresh longer.
- 3/4 cup all-purpose flour: Just enough to bind everything without making the brownies cakey.
- 1 cup unsweetened cocoa powder (Dutch process recommended): For that deep, rich chocolate flavor and gorgeous dark color. Dutch process cocoa is less acidic, resulting in a smoother, mellower chocolate taste.
- 1 1/2 TBSP cornstarch: Another secret weapon for a truly fudgy brownie! It helps tenderize the crumb.
- 1/2 tsp salt: Balances the sweetness and enhances all those chocolatey notes.
- 1 cup semi-sweet chocolate chips: Because more chocolate is always a good idea, and they melt into little pockets of heaven.
- 1 cup marshmallow creme: The star of our show, creating those beautiful, gooey swirls.
How to Make Marshmallow Brownies
Ready to get your hands a little bit chocolaty? Let’s dive in!
- Prepare Pan and Oven: First things first, let’s get organized! Preheat your oven to a cozy 350°F (175°C). Grab a 9×13-inch baking pan and line it with parchment paper. Make sure to leave a little overhang on the sides – this is your secret trick for easy lifting later! Give that parchment paper a light grease too, just to be extra sure nothing sticks.
- Mix Wet Ingredients: In a big mixing bowl, whisk together your granulated sugar, those glorious eggs, and that extra egg yolk until they’re nicely combined and look a little paler. This step incorporates air and helps with the texture. Now, pour in your melted butter, the fragrant vanilla extract, and the oil. Mix it all up until it’s super smooth and everything is perfectly combined.
- Combine Dry Ingredients: In a separate, medium-sized bowl, grab your sifter (or a whisk if you don’t have one) and combine the flour, cocoa powder, cornstarch, and salt. Sifting helps prevent lumps and ensures an even distribution of flavor.
- Create Brownie Batter: This is where the magic really starts! Gradually add the dry ingredients into your wet ingredients. Use a wooden spoon or a trusty rubber spatula for this part. Mix gently, just until everything is combined. Remember, overmixing can lead to tough brownies, and we want fudgy! Once mixed, fold in those irresistible semi-sweet chocolate chips. While these are wonderfully fudgy, if you’re ever craving a classic, dense chocolate treat, you absolutely have to try my recipe for Grandma’s Easy Lunch Lady Brownies – they’re a timeless favorite!
- Layer and Swirl: Pour about half of your glorious brownie batter into the prepared pan and spread it out evenly. Now for the fun part! Take spoonfuls of your marshmallow creme and drop them randomly over this first layer of batter. Don’t be shy! Then, carefully pour the remaining brownie batter on top, spreading it gently to cover most of the marshmallow. For those beautiful swirls, grab a knife and gently drag it through the layers in a zig-zag or swirling motion. Don’t overdo it, or your marshmallow will disappear completely!
- Bake: Slide your pan into the preheated oven and bake for 28-32 minutes. You’ll know they’re done when a toothpick inserted into the brownie portion (steer clear of the marshmallow spots for this test!) comes out with a few moist crumbs. The marshmallow areas will puff up beautifully and get a lovely, light golden hue.
- Cool and Serve: This is the hardest part, I know! It’s crucial to let the brownies cool completely in the pan before you even think about cutting into them. The marshmallow needs time to set, and the brownies will firm up into that perfect fudgy consistency. Once cool, use the parchment paper overhang to lift them out, slice, and serve!
Substitutions & Additions
One of the joys of baking is making a recipe your own! These Marshmallow Brownies are super adaptable:
- Chocolate Chips: Swap out semi-sweet for milk chocolate, dark chocolate, white chocolate, or even a mix of your favorites!
- Nuts: Fold in a half cup of chopped walnuts or pecans with the chocolate chips for extra crunch and a nutty flavor.
- Extra Toppings: After baking (or even before!), sprinkle a little flaky sea salt on top for a gourmet touch that enhances the chocolate. You could also drizzle with a little melted chocolate or a caramel sauce once cooled.
- Marshmallow Options: If you don’t have marshmallow creme, you can use mini marshmallows. Drop them on top of the first brownie layer, then add the second brownie layer and swirl. Or, if you want a toasted marshmallow topping, add them for the last 5-10 minutes of baking.
- Candy Mix-ins: Get creative! Add chopped candy bars, M&M’s, or even crushed pretzels for a salty-sweet twist. If you’re a fan of no-bake delights, you might also adore my No-Bake Oreo Bars, which offer a different kind of quick sweetness!
Tips for Success
A few insider tips to ensure your Marshmallow Brownies turn out absolutely perfect every single time:
- Don’t Overmix: This is crucial for fudgy brownies! Mix the dry and wet ingredients just until combined. A few streaks of flour are okay; they’ll disappear during baking.
- Use Quality Cocoa: The cocoa powder is the star here. Using a good quality unsweetened cocoa, especially Dutch process, will make a noticeable difference in flavor and color.
- Patience is a Virtue (with Cooling): I know, I know, it’s torture to wait! But seriously, resist the urge to cut these warm. The marshmallow needs to set, and the brownies need to firm up to achieve that perfect fudgy, non-crumbly texture. Pop them in the fridge for an hour if you’re in a hurry to cut clean squares!
- Room Temperature Ingredients: While the butter is melted, having your eggs at room temperature helps them incorporate more smoothly into the batter, leading to a more uniform texture.
- Grease the Parchment: Even though it’s non-stick, a light spray or swipe of butter on the parchment paper ensures your brownies lift out effortlessly.
How to Store Marshmallow Brownies
These brownies are so good, they might not last long! But just in case you have some leftovers, here’s how to keep them fresh:
- Countertop: Store cooled brownies in an airtight container at room temperature for up to 3-4 days. Placing a slice of bread in the container can help keep them soft and moist!
- Refrigerator: For a longer shelf life, or if your kitchen is particularly warm, store them in an airtight container in the fridge for up to a week. They’ll be a bit firmer, but still delicious! You can warm them slightly in the microwave for a few seconds to bring back that gooey marshmallow.
- Freezer: These brownies freeze beautifully! Wrap individual slices tightly in plastic wrap, then place them in a freezer-safe bag or container. They’ll keep for up to 3 months. Thaw at room temperature or warm gently in the microwave.
FAQs
Got questions? I’ve got answers!
- Can I use regular marshmallows instead of marshmallow creme?
- Yes, absolutely! For the swirling effect, you can scatter about 1.5-2 cups of mini marshmallows over the first layer of batter, then cover with the remaining batter and swirl. Be aware that regular marshmallows might melt down a bit more, but they’ll still create a delicious gooey layer. For another indulgent bar-style dessert, especially if you love a good creamy texture, don’t miss out on my Easy Chocolate Chip Cheesecake Bars!
- Why do you recommend Dutch process cocoa?
- Dutch process cocoa has been treated to reduce its acidity, resulting in a darker color and a mellower, less bitter chocolate flavor. It creates a richer, smoother brownie. Regular unsweetened cocoa works too, but the flavor profile will be slightly different.
- How do I get clean cuts?
- The key is to let the brownies cool completely! Once fully cooled (and ideally chilled for about 30 minutes in the fridge), use a large, sharp knife. For extra clean cuts, run your knife under hot water and wipe it clean between each slice.
- Can I make these ahead of time?
- Definitely! These brownies are fantastic made a day in advance, giving the flavors time to meld and the texture to set perfectly. Just store them as suggested above.
I truly hope you enjoy baking and devouring these Marshmallow Brownies as much as I do. They’re a little slice of heaven, perfect for sharing (or not!). Happy baking, sweet friends!
For more delicious recipes and baking inspiration, be sure to follow us on Pinterest!

Gooey, Fudgy, and Oh-So-Easy: The Best Homemade Marshmallow Brownies You'll Ever Bake!
Ingredients
Equipment
Method
- Step 1: Prepare Pan and Oven: Preheat your oven to a cozy 350°F (175°C). Grab a 9x13-inch baking pan and line it with parchment paper. Make sure to leave a little overhang on the sides – this is your secret trick for easy lifting later! Give that parchment paper a light grease too, just to be extra sure nothing sticks.
- Step 2: Mix Wet Ingredients: In a big mixing bowl, whisk together your granulated sugar, those glorious eggs, and that extra egg yolk until they're nicely combined and look a little paler. This step incorporates air and helps with the texture. Now, pour in your melted butter, the fragrant vanilla extract, and the oil. Mix it all up until it’s super smooth and everything is perfectly combined.
- Step 3: Combine Dry Ingredients: In a separate, medium-sized bowl, grab your sifter (or a whisk if you don’t have one) and combine the flour, cocoa powder, cornstarch, and salt. Sifting helps prevent lumps and ensures an even distribution of flavor.
- Step 4: Create Brownie Batter: Gradually add the dry ingredients into your wet ingredients. Use a wooden spoon or a trusty rubber spatula for this part. Mix gently, just until everything is combined. Remember, overmixing can lead to tough brownies, and we want fudgy! Once mixed, fold in those irresistible semi-sweet chocolate chips.
- Step 5: Layer and Swirl: Pour about half of your glorious brownie batter into the prepared pan and spread it out evenly. Now for the fun part! Take spoonfuls of your marshmallow creme and drop them randomly over this first layer of batter. Don't be shy! Then, carefully pour the remaining brownie batter on top, spreading it gently to cover most of the marshmallow. For those beautiful swirls, grab a knife and gently drag it through the layers in a zig-zag or swirling motion. Don't overdo it, or your marshmallow will disappear completely!
- Step 6: Bake: Slide your pan into the preheated oven and bake for 28-32 minutes. You'll know they're done when a toothpick inserted into the brownie portion (steer clear of the marshmallow spots for this test!) comes out with a few moist crumbs. The marshmallow areas will puff up beautifully and get a lovely, light golden hue.
- Step 7: Cool and Serve: This is the hardest part, I know! It’s crucial to let the brownies cool completely in the pan before you even think about cutting into them. The marshmallow needs time to set, and the brownies will firm up into that perfect fudgy consistency. Once cool, use the parchment paper overhang to lift them out, slice, and serve!