Oh, friend, do you remember those golden days? The ones filled with sleepovers, movie nights, and the undeniable aroma of warm, cheesy pizza goodness? For me, a big part of that memory always involved tearing into a piping hot pizza roll. But let me tell you, while the store-bought ones hit the spot back then, nothing, and I mean nothing, beats the fresh, crispy, and utterly divine taste of homemade pizza rolls. And guess what? They’re ridiculously easy to make from scratch, quicker than you might think, and guaranteed to become a new family favorite. Forget those tiny, sometimes soggy, freezer bites; we’re talking about a whole new level of cheesy, pepperoni-packed perfection that’s ready to satisfy your cravings in no time. If you love classic cheesy snacks, you might also enjoy making your own crispy air fryer mozzarella sticks!
Why You’ll Love Homemade Pizza Rolls
- Fast: Quick prep and bake time mean less waiting, more eating!
- Easy: Simple ingredients and straightforward steps make this a beginner-friendly recipe.
- Giftable: Pack them up for a friend, neighbor, or a hungry college student – they’ll be thrilled!
- Crowd-pleasing: Perfect for game day, parties, or just a fun family snack night. Everyone loves them!
Ingredients
Gather ’round, because these are the simple stars of our show! You likely have most of these in your pantry already.
- 2 cups all-purpose flour: The foundation of our delicious, chewy crust.
- 1 teaspoon active dry yeast: This little magic worker gives our dough that lovely rise.
- ¾ cup warm water (110°F): Just warm enough to wake up that yeast, not too hot to kill it! Think bathwater warm.
- 1 cup shredded mozzarella cheese: The quintessential pizza cheese! It melts beautifully and gets wonderfully gooey. Feel free to use a blend if you like.
- ½ cup sliced pepperoni: Small, crispy rounds of joy. You can chop them smaller if you prefer, especially for tiny rolls.
- ½ cup marinara sauce (for dipping): Your favorite jarred sauce works perfectly here. It’s essential for that classic pizza experience!
- Italian seasoning, to taste: A sprinkle adds that authentic pizza parlor flavor. Oregano, basil, marjoram – all the good stuff!
- Salt, to taste: Balances out the flavors in our dough.
How to Make Homemade Pizza Rolls
Alright, let’s get our hands a little floury and make some magic happen! This is where the fun begins, and trust me, it’s easier than you think.
- Activate Yeast: First things first, grab a medium-sized bowl. Pour in your warm water, and then sprinkle the active dry yeast over the top. Give it a gentle stir and then just let it hang out for about 5 to 10 minutes. You’ll know it’s ready when it gets nice and foamy on top – that means your yeast is alive and ready to make some delicious dough!
- Prepare Dough: In a larger bowl, whisk together your all-purpose flour and a pinch of salt. Make a little “well” (like a small crater) in the center of your flour mixture. Now, pour that foamy yeast mixture right into the well. With a spoon or your hands, start stirring everything together until a cohesive, smooth dough forms. It might be a little sticky at first, that’s totally normal!
- Knead for Glory: Lightly flour your countertop or a clean work surface. Turn the dough out onto it and start kneading! Push, fold, turn, repeat. Do this for about 5 to 7 minutes. You’re aiming for a dough that feels elastic, smooth, and no longer super sticky. It’s a little workout, but so worth it!
- First Rise: Find a clean bowl and lightly grease it with a tiny bit of olive oil or cooking spray. Place your beautifully kneaded dough in the bowl, giving it a little roll to coat it lightly with oil. Cover the bowl with a clean kitchen towel or plastic wrap. Now, find a warm spot in your kitchen (think a sunny windowsill or near a warm oven) and let it rise for about 1 hour, or until it has happily doubled in size. This step is crucial for that soft, fluffy interior.
- Form Rolls: Once your dough has risen, gently “punch it down” to release the air. This sounds aggressive, but it’s just a soft push. Transfer the dough back to your lightly floured surface. Roll it out into a rectangle – think about the size of a baking sheet. Then, use a knife or a pizza cutter to cut the dough into individual squares. Don’t worry about perfection; rustic is charming! And if you’re a true pizza enthusiast, you absolutely have to try our recipe for homemade Pizza Hut breadsticks – they’re seriously addictive!
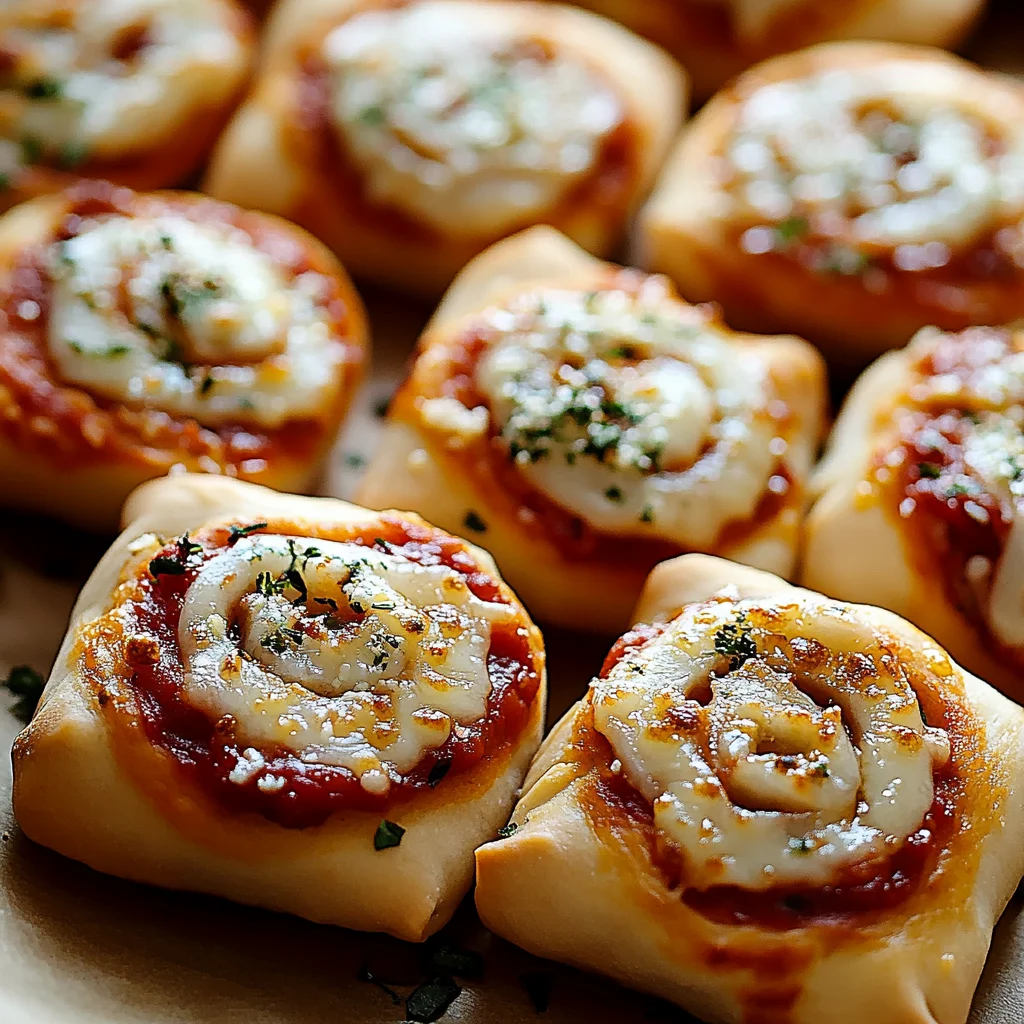
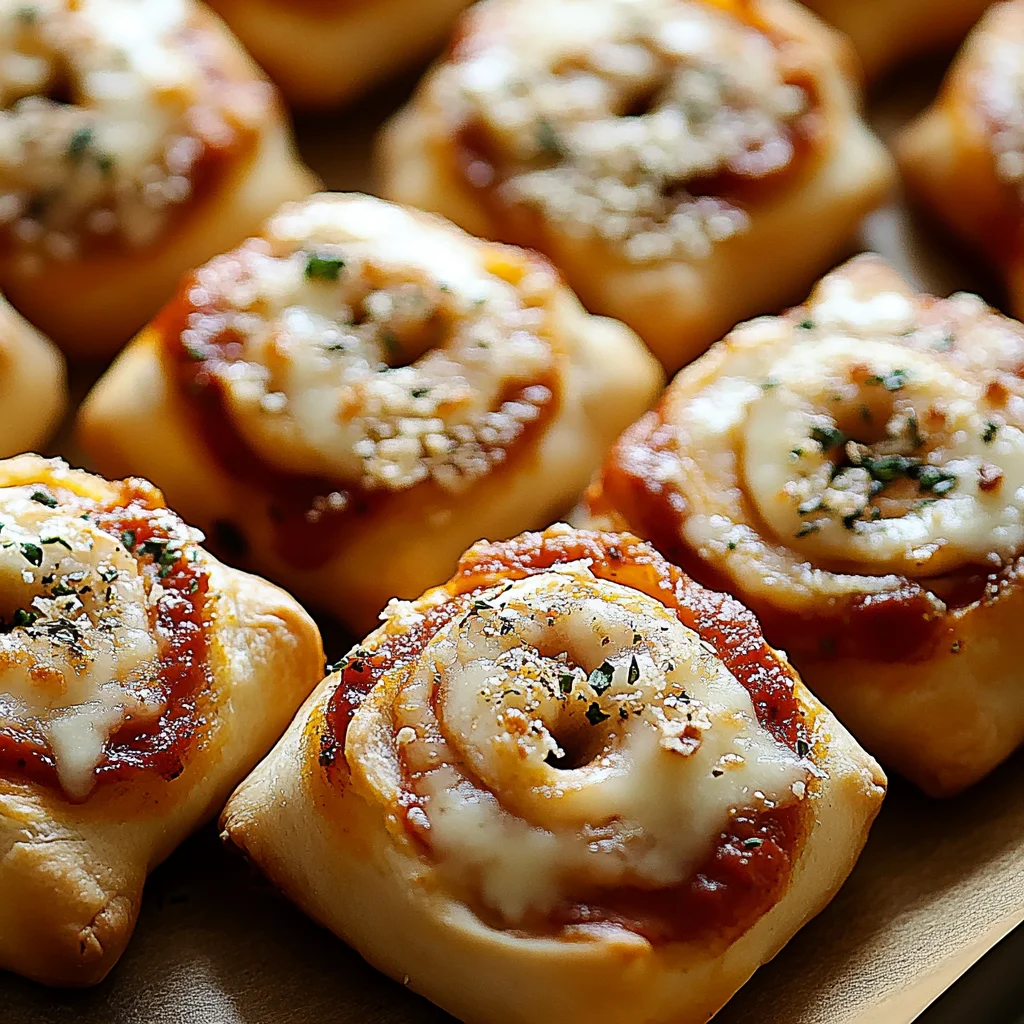
- Fill and Seal: This is where your pizza rolls get their personality! Take each dough square and place a small spoonful of shredded mozzarella cheese in the center. Add a few slices of pepperoni – or whatever fillings your heart desires! If you’re feeling fancy, sprinkle a little Italian seasoning over the top. Now, carefully fold one corner of the dough over the filling to meet the opposite corner, creating a triangle. Pinch the edges tightly to seal everything inside. You want to make sure no cheesy goodness escapes during baking!
- Bake: Preheat your oven to a cozy 375°F (190°C). Line a baking sheet with parchment paper – this makes for easy cleanup and prevents sticking. Arrange your sealed pizza rolls on the baking sheet, making sure they have a little space between them. Pop them into the preheated oven and bake for 15 to 20 minutes, or until the crust is a beautiful golden brown and the cheese inside is gloriously melted and bubbly.
- Serve: Oh, the aroma! Once they’re out of the oven, resist the urge to immediately bite into one (they’ll be lava hot!). Let them cool for just a few minutes on the baking sheet. Serve them warm with a side of marinara sauce for dipping. Pure bliss!
Substitutions & Additions
This recipe is a fantastic blank canvas for your culinary creativity! Here are some ideas to mix things up:
- Cheese Swap: No mozzarella? No problem! Try a mix of provolone, cheddar, or even a little Parmesan for a different flavor profile.
- Meat Mania: Beyond pepperoni, think cooked crumbled sausage, diced cooked ham, crispy bacon bits, or even tiny meatballs.
- Veggie Boost: Finely diced bell peppers, sautéed mushrooms, black olives, or even a sprinkle of finely chopped spinach can add color and nutrients.
- Sauce It Up: Instead of marinara, try a pesto base, a spicy arrabbiata, or even a creamy Alfredo for something truly unique.
- Spice Things Up: A pinch of red pepper flakes in the filling will give your pizza rolls a zesty kick!
- Everything Bagel Seasoning: For a savory crust, sprinkle some everything bagel seasoning on top of the rolls before baking.
Want to get even more creative with your pizza rolls? You could even take inspiration from our sausage Doritos pizza rolls for a truly unique twist!
Tips for Success
I’ve made my share of pizza rolls (and learned from a few mistakes!), so here are my top tips to ensure yours turn out perfect every time:
- Water Temperature is Key: Don’t guess with the water temperature for your yeast. Too cold, and the yeast won’t activate; too hot, and you’ll kill it. A cooking thermometer is your best friend here, aiming for 105-115°F (40-46°C).
- Don’t Overfill: It’s tempting to stuff them to the brim, but too much filling makes them hard to seal and prone to bursting open. A little goes a long way!
- Pinch Tightly: Really make sure those edges are sealed. I like to press them together with my fingers, and then gently crimp them with a fork for extra security and a pretty pattern.
- Flour Lightly: When rolling out the dough, use just enough flour to prevent sticking. Too much flour can make the dough tough.
- Make Ahead: You can prepare the dough in advance! After the first rise, punch it down, cover it tightly, and refrigerate for up to 24 hours. Let it come to room temperature for about 30 minutes before rolling and filling.
- Freezing Unbaked Rolls: If you want to prep a big batch, form and fill the rolls, then freeze them on a baking sheet until solid. Transfer to a freezer-safe bag and bake from frozen, adding a few extra minutes to the baking time.
How to Store Homemade Pizza Rolls
If you’re lucky enough to have any leftovers, here’s how to keep them fresh:
- Countertop: Baked pizza rolls are best enjoyed fresh, but they can be kept at room temperature in an airtight container for up to 2 hours.
- Refrigerator: Store cooled pizza rolls in an airtight container in the fridge for up to 3-4 days.
- Freezer (Baked): Once completely cooled, place baked pizza rolls in a single layer on a baking sheet and freeze until solid. Transfer them to a freezer-safe bag or container. They’ll keep well for up to 2-3 months.
- Reheating: For best results, reheat baked pizza rolls in a toaster oven or air fryer at 350°F (175°C) for 5-10 minutes, or until heated through and crispy. A microwave will work, but they might be a bit soft.
FAQs
Got questions? I’ve got answers!
Q: Can I use store-bought pizza dough?
A: Absolutely! While I love the scratch-made dough, using store-bought pizza dough (fresh or frozen, thawed) is a fantastic shortcut that makes this recipe even quicker. Just follow the instructions for forming and filling the rolls.
Q: What if my yeast doesn’t foam?
A: This usually means your water wasn’t the right temperature, or your yeast is old/inactive. Discard it and try again with fresh yeast and properly warmed water. Active yeast is crucial for a good rise!
Q: Can I make these in an air fryer?
A: Yes! Preheat your air fryer to 350°F (175°C). Place the pizza rolls in a single layer in the basket, ensuring they don’t touch. Cook for 6-10 minutes, flipping halfway through, until golden brown and crispy. Cooking time will vary by air fryer model, so keep an eye on them!
Q: Can I make these gluten-free?
A: You can try! Use a 1:1 gluten-free all-purpose flour blend. Keep in mind that gluten-free dough can be a bit trickier to work with and might require less kneading. The texture may also vary slightly.
For more delicious recipes and kitchen inspiration, be sure to follow us on Pinterest!

Homemade Pizza Rolls from Scratch!
Ingredients
Equipment
Method
- Step 1: First things first, grab a medium-sized bowl. Pour in your warm water, and then sprinkle the active dry yeast over the top. Give it a gentle stir and then just let it hang out for about 5 to 10 minutes. You’ll know it's ready when it gets nice and foamy on top – that means your yeast is alive and ready to make some delicious dough!
- Step 2: In a larger bowl, whisk together your all-purpose flour and a pinch of salt. Make a little "well" (like a small crater) in the center of your flour mixture. Now, pour that foamy yeast mixture right into the well. With a spoon or your hands, start stirring everything together until a cohesive, smooth dough forms. It might be a little sticky at first, that’s totally normal!
- Step 3: Lightly flour your countertop or a clean work surface. Turn the dough out onto it and start kneading! Push, fold, turn, repeat. Do this for about 5 to 7 minutes. You're aiming for a dough that feels elastic, smooth, and no longer super sticky. It’s a little workout, but so worth it!
- Step 4: Find a clean bowl and lightly grease it with a tiny bit of olive oil or cooking spray. Place your beautifully kneaded dough in the bowl, giving it a little roll to coat it lightly with oil. Cover the bowl with a clean kitchen towel or plastic wrap. Now, find a warm spot in your kitchen (think a sunny windowsill or near a warm oven) and let it rise for about 1 hour, or until it has happily doubled in size. This step is crucial for that soft, fluffy interior.
- Step 5: Once your dough has risen, gently "punch it down" to release the air. This sounds aggressive, but it's just a soft push. Transfer the dough back to your lightly floured surface. Roll it out into a rectangle – think about the size of a baking sheet. Then, use a knife or a pizza cutter to cut the dough into individual squares. Don't worry about perfection; rustic is charming!
- Step 6: This is where your pizza rolls get their personality! Take each dough square and place a small spoonful of shredded mozzarella cheese in the center. Add a few slices of pepperoni – or whatever fillings your heart desires! If you're feeling fancy, sprinkle a little Italian seasoning over the top. Now, carefully fold one corner of the dough over the filling to meet the opposite corner, creating a triangle. Pinch the edges tightly to seal everything inside. You want to make sure no cheesy goodness escapes during baking!
- Step 7: Preheat your oven to a cozy 375°F (190°C). Line a baking sheet with parchment paper – this makes for easy cleanup and prevents sticking. Arrange your sealed pizza rolls on the baking sheet, making sure they have a little space between them. Pop them into the preheated oven and bake for 15 to 20 minutes, or until the crust is a beautiful golden brown and the cheese inside is gloriously melted and bubbly.
- Step 8: Oh, the aroma! Once they’re out of the oven, resist the urge to immediately bite into one (they'll be lava hot!). Let them cool for just a few minutes on the baking sheet. Serve them warm with a side of marinara sauce for dipping. Pure bliss!