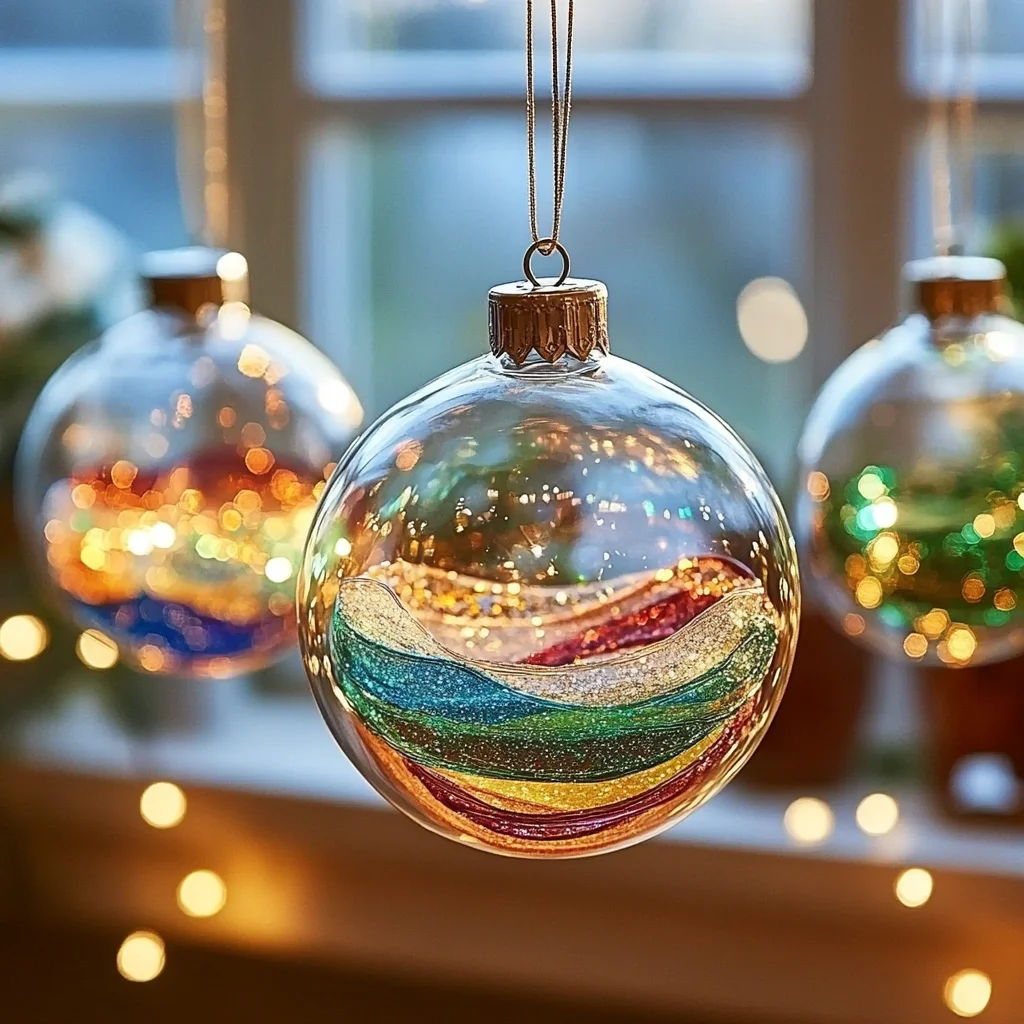
Hey there, sunshine! Do you remember those childhood days, watching light dance through a stained-glass window or catching glints of color from a little something hanging in the kitchen window? There’s just something magical about how light transforms a space, isn’t there? Well, today, I’m going to share a little secret with you that brings all that nostalgic charm right into your home, no fancy tools or artistic genius required. We’re talking about homemade DIY Suncatchers, and let me tell you, they are so incredibly easy, quick, and just downright fun to make. Get ready to sprinkle some magic into your windows!
Why You’ll Love DIY Suncatcher
- Fast
- Easy
- Giftable
- Crowd-pleasing
Ingredients
Gathering your supplies for these beautiful suncatchers is as simple as it gets. You probably have most of these tucked away in your craft drawer already!
- Clear School Glue: The star of our show! Think Elmer’s or any basic clear liquid glue.
- Food Coloring or Liquid Watercolor Paints: This is where the magic happens! A few drops are all you need to create stunning hues.
- Plastic Lid or Clear Plastic Sheet: Think yogurt lids, takeout container lids, or even clear plastic report covers. Just make sure they’re clean!
- Toothpicks or Paintbrushes: Perfect for swirling and blending those gorgeous colors.
- Optional: Glitter, Sequins, or Mini Beads: For that extra sparkle and texture, because who doesn’t love a little bling?
- Optional: String or Suction Cup Hooks: To proudly display your finished masterpiece!
How to Make DIY Suncatcher
Alright, let’s get those creative juices flowing! This is truly a step-by-step process that anyone can master, no matter your age or crafting experience.
1. Prep Your Workspace: First things first, lay down some wax paper or an old newspaper to protect your table. Trust me, it makes cleanup a breeze! Then, arrange your clean plastic lids or cut sheets of clear plastic on top. This is where your suncatchers will take shape.
2. Pour the Glue: Now, for the main event! Pour your clear school glue into each plastic lid. You want it to be about 0.5 to 1 centimeter thick – that’s roughly half an inch or a little less. Gently tilt the lid from side to side to help the glue spread evenly across the entire surface. This creates your canvas!
3. Add Your Colors (and Sparkle!): This is my favorite part! Carefully drop single drops of food coloring or liquid watercolor paints onto the glue. Don’t go overboard; a little goes a long way for vibrant designs. Speaking of vibrant and beautiful, if you love starting your day with something sweet and full of sunshine, you’ll adore these Fluffy Lemon Ricotta Pancakes! If you’re using glitter, sequins, or mini beads, now’s the time to sprinkle them in. They’ll sink slightly into the glue, creating a lovely embedded effect.
4. Swirl and Create: Grab a toothpick or a small paintbrush and gently swirl the colors together. You can make spirals, marbling effects, or abstract designs. There’s no right or wrong way here – just have fun with it! The best part about these suncatchers is seeing all those vibrant colors come to life, much like the beautiful presentation of a Patriotic Flag Fruit Dessert on a summer day.
5. Patience, My Friend, Patience: This is the hardest part for excited crafters! You need to let your suncatcher dry completely on a flat surface. This can take anywhere from 24 to 72 hours, depending on how thick your glue layer is and the humidity in your home. You’ll know it’s ready when the glue turns completely transparent and you can easily peel it from the lid. Resist the urge to poke it!
6. Peel and Trim: Once it’s fully dry, carefully peel your beautiful, translucent suncatcher from the plastic lid. It should pop right off! If there are any rough or uneven edges, you can tidy them up with a pair of scissors for a clean finish.
7. Hang Your Masterpiece: To display your new art, you can punch a small hole at the top of the suncatcher (a regular hole punch works great once it’s dry!) or simply use a piece of clear tape to attach some string or ribbon. Then, hang your finished suncatcher in a sunny window and watch the light dance through your creation! Suction cup hooks are also fantastic for a no-fuss display.

Substitutions & Additions
This DIY suncatcher recipe is super flexible, which is part of its charm! Get creative with these ideas:
- Color Combos: Instead of random drops, try themed colors! Think blues and greens for an ocean vibe, reds and oranges for a sunset, or pastels for spring.
- Natural Elements: Before the glue dries, gently press in tiny dried flowers, small leaves, or even fine sand for an earthy texture.
- Cut-out Shapes: Instead of lids, you can pour the glue onto parchment paper or a silicone mat in specific shapes, like hearts, stars, or even animal outlines. Just be sure to draw a slightly thicker border to help it hold its shape.
- Glitter Glue: Short on regular glue and glitter? Just use glitter glue! You won’t get the same deep color swirls, but it’s still fun.
Tips for Success
Even though this craft is straightforward, a few pointers can ensure your suncatchers turn out perfectly every time:
- Don’t Over-Swirl: If you swirl too much, your colors might blend into a muddy brown. Gentle swirls are key for distinct, vibrant patterns.
- Thickness Matters: If your glue layer is too thin, it might tear when you peel it. Too thick, and it will take forever to dry. Aim for that 0.5-1 cm sweet spot.
- Patient Drying: Seriously, this is the most important tip! If you try to peel it before it’s fully transparent, it will be sticky and messy. Place it somewhere safe and out of the way where it won’t be disturbed for a day or two.
- Keep it Flat: Make sure your drying surface is perfectly flat, or your suncatcher might dry with an uneven surface.
- Prep-Ahead: If you’re doing this with kids or a group, you can pre-pour the glue into the lids to save a bit of time, especially for little ones who might get impatient. These suncatchers also make absolutely wonderful, heartfelt gifts for teachers, grandparents, or neighbors. Just like a batch of Easy No-Bake Caramel Pretzel Bars, they show you put a little love into something special.
How to Store DIY Suncatcher
Once your beautiful suncatchers are ready, they’re pretty durable for hanging! However, if you need to store them:
- Flat and Cool: Store them flat between sheets of wax paper or parchment paper to prevent them from sticking together or bending. Keep them in a cool, dry place away from direct heat, which could make the glue tacky again.
- Avoid Stacking: If you stack them, put a piece of wax paper between each one.
- Shelf Life: These suncatchers should last for years if properly cared for! The colors won’t fade quickly, but extreme heat or direct sunlight over very long periods could potentially make the glue brittle.
FAQs
Q: My glue isn’t drying clear, what’s wrong?
A: It’s likely not fully dry yet! Glue can take up to 72 hours, especially if it’s thick or in a humid environment. Give it more time. Also, ensure you used clear school glue, not white craft glue.
Q: Can I use acrylic paint instead of food coloring?
A: Acrylic paint is thicker and might not spread as well in the glue, and it could make the suncatcher less translucent. Liquid watercolors or food coloring are best for that stained-glass effect.
Q: What if my suncatcher gets dirty?
A: You can gently wipe it with a soft, damp cloth. Avoid harsh chemicals or abrasive materials, as they might scratch or damage the surface.
Q: Can I make these in different shapes without a plastic lid?
A: Absolutely! You can pour the glue directly onto a silicone mat or parchment paper that’s taped down to a flat surface. You can even trace shapes first if you want. Just be aware they might be a little trickier to peel if they’re very thin or intricate.
Don’t forget to follow us on Pinterest for more easy recipes and fun ideas!

Easy DIY Suncatchers for All Ages
Ingredients
Equipment
Method
- Step 1: Prep Your Workspace: Lay down some wax paper or an old newspaper to protect your table. Arrange your clean plastic lids or cut sheets of clear plastic on top. This is where your suncatchers will take shape.
- Step 2: Pour the Glue: Pour your clear school glue into each plastic lid. You want it to be about 0.5 to 1 centimeter thick – that’s roughly half an inch or a little less. Gently tilt the lid from side to side to help the glue spread evenly across the entire surface. This creates your canvas!
- Step 3: Add Your Colors (and Sparkle!): Carefully drop single drops of food coloring or liquid watercolor paints onto the glue. Don't go overboard; a little goes a long way for vibrant designs. If you're using glitter, sequins, or mini beads, now's the time to sprinkle them in. They’ll sink slightly into the glue, creating a lovely embedded effect.
- Step 4: Swirl and Create: Grab a toothpick or a small paintbrush and gently swirl the colors together. You can make spirals, marbling effects, or abstract designs. There’s no right or wrong way here – just have fun with it!
- Step 5: Patience, My Friend, Patience: You need to let your suncatcher dry completely on a flat surface. This can take anywhere from 24 to 72 hours, depending on how thick your glue layer is and the humidity in your home. You’ll know it’s ready when the glue turns completely transparent and you can easily peel it from the lid. Resist the urge to poke it!
- Step 6: Peel and Trim: Once it’s fully dry, carefully peel your beautiful, translucent suncatcher from the plastic lid. It should pop right off! If there are any rough or uneven edges, you can tidy them up with a pair of scissors for a clean finish.
- Step 7: Hang Your Masterpiece: To display your new art, you can punch a small hole at the top of the suncatcher (a regular hole punch works great once it’s dry!) or simply use a piece of clear tape to attach some string or ribbon. Then, hang your finished suncatcher in a sunny window and watch the light dance through your creation! Suction cup hooks are also fantastic for a no-fuss display.