Hey there, kitchen adventurers! Let’s talk comfort food. You know, those meals that just wrap you up like a cozy blanket on a chilly evening? For me, one of those dishes has always been quesadillas. There’s something so inherently satisfying about that perfectly crispy tortilla giving way to gooey, melted cheese and a flavorful filling.
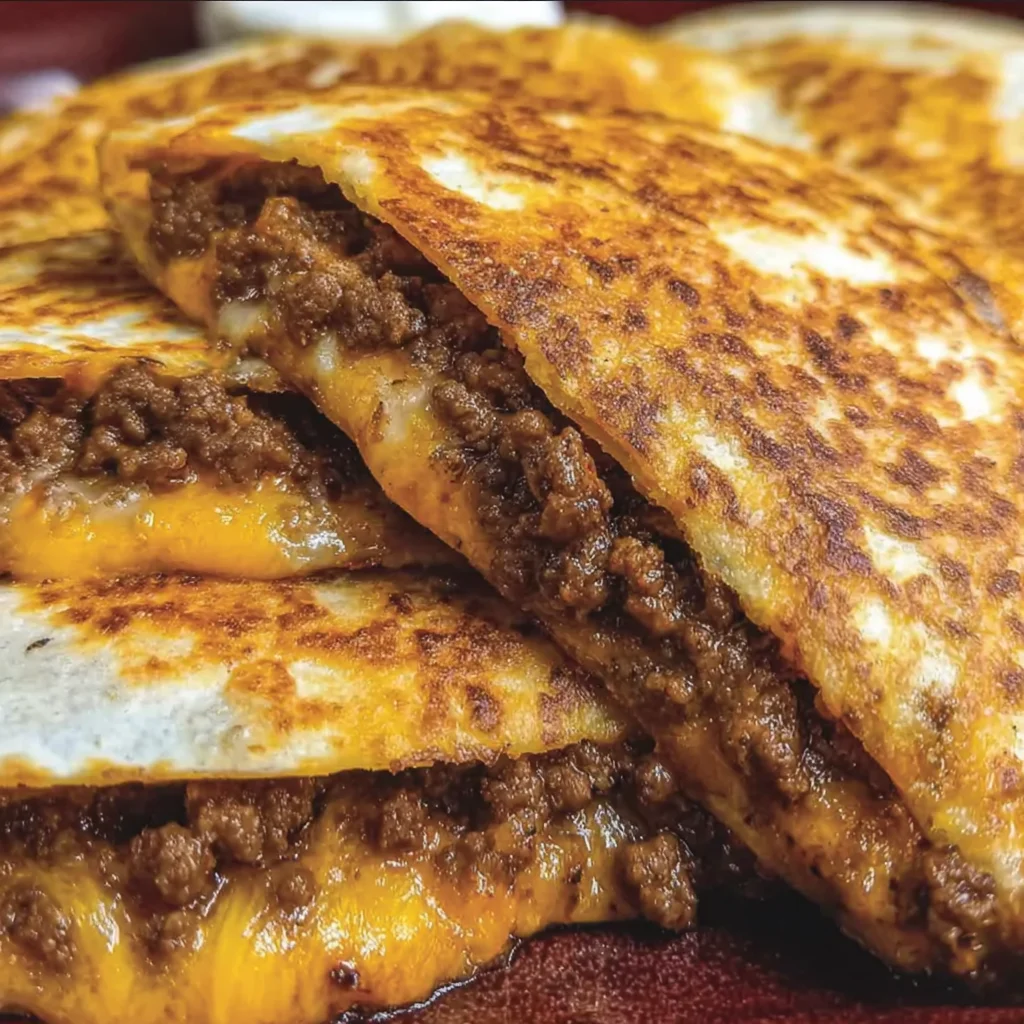
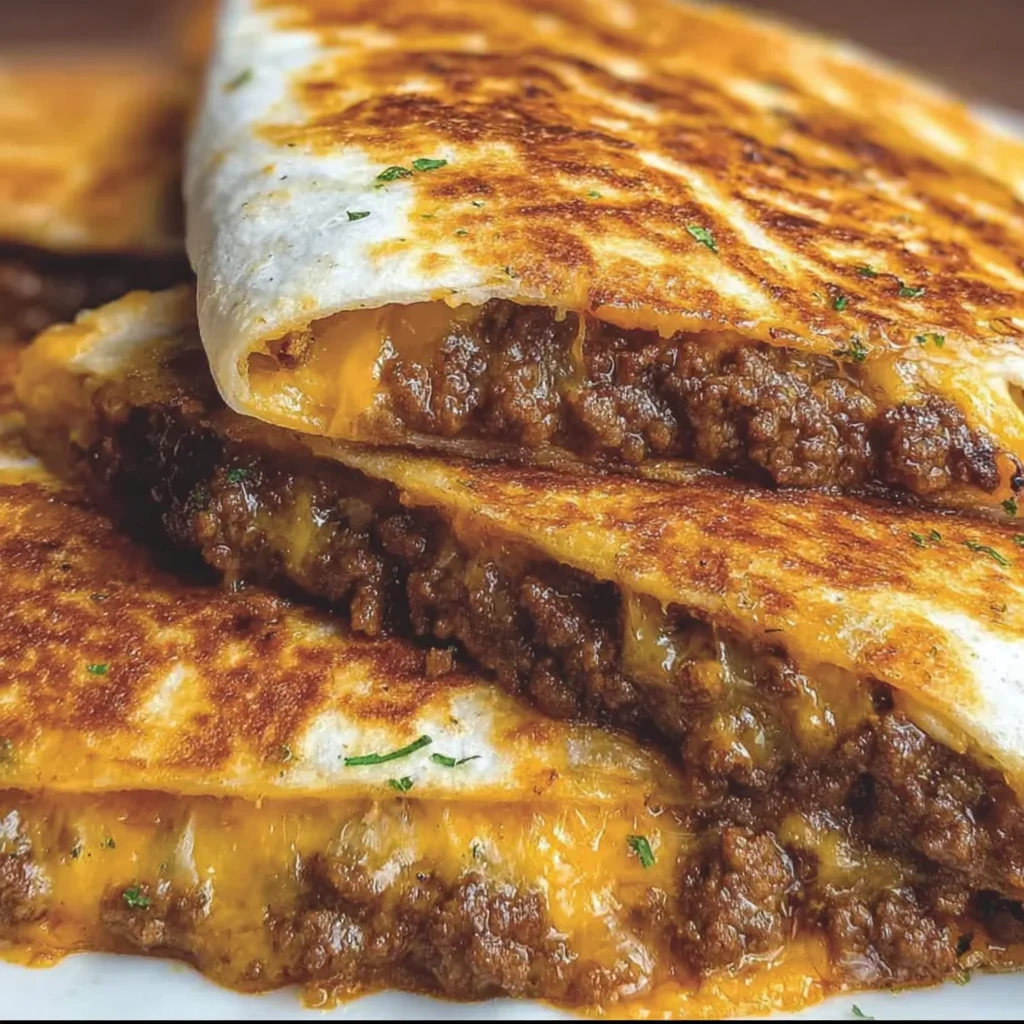
While I love all kinds of quesadillas, these Ground Beef Cheesy Quesadillas hold a special place in my heart. They’re incredibly simple to make, packed with flavor, and they disappear fast whenever I make them. Whether it’s a speedy weeknight dinner, a fun lunch, or just because you’re craving something delicious, this recipe is an absolute winner. Get ready to make some magic happen in your skillet!
Why You’ll Love This Recipe
- Fast: Seriously quick to get on the table.
- Easy: Simple ingredients, straightforward steps.
- Giftable: Okay, maybe not giftable like cookies, but definitely shareable – perfect for feeding a crowd or hungry kids!
- Crowd-pleasing: Who doesn’t love a cheesy, savory quesadilla?
Ingredients
Here’s what you’ll need to whip up these beauties. Most of these are probably hanging out in your pantry or fridge right now!
- 1 lb 90% lean ground beef: We’re starting with the star protein! Using 90% lean means less grease to drain, which is always a win in my book.
- 1 large onion, chopped: Adds essential savory depth.
- 2 cloves garlic, minced: Because everything is better with garlic, right?
- 1 tablespoon tomato paste: This little tube is a secret weapon for adding rich, concentrated tomato flavor.
- 1 tablespoon chili powder: Provides that classic Tex-Mex warmth.
- 1 teaspoon ground cumin: Earthy and fragrant, a must for this flavor profile.
- 1/2 teaspoon smoked paprika: Adds a lovely smoky note that really elevates the beef.
- 1/4 teaspoon cayenne pepper (optional): If you like a little kick, this is your friend! Skip it if you prefer mild.
- 1/2 cup beef broth: Helps simmer the flavors together and keeps the filling moist.
- Salt and black pepper to taste: Essential for seasoning your meat just right.
- 10 flour tortillas (8-inch recommended): The perfect size for folding and crisping. Flour tortillas are pliable and get wonderfully golden brown.
- 2 cups shredded cheddar cheese: The glorious, melty glue that holds it all together! You can buy pre-shredded or shred your own.
- 1 tablespoon olive oil: For cooking the onions and getting that perfect crispy tortilla exterior.
How to Make It
Ready? Let’s get cooking! You’ll be surprised how quickly these come together.
- First things first, grab a large skillet and heat it over medium-high heat. Add your ground beef and start cooking it, breaking it up into crumbles with a spoon as you go. Cook it until it’s all browned and no pink remains. Once it’s cooked, carefully drain off any excess grease. I find tilting the pan and using a spoon or paper towel to soak it up works great!
- Now, toss the chopped onion into the same skillet with the browned beef. Cook the onion for about 5-7 minutes, stirring occasionally, until it’s softened and looks a bit translucent. Then, stir in your minced garlic and cook for just one more minute until you can smell that amazing garlic aroma. Don’t let it burn!
- Time for the flavor bomb! Stir in the tomato paste, chili powder, cumin, smoked paprika, and the cayenne pepper now if you’re using it. Cook this fragrant spice mixture for about 1 minute, stirring constantly. This step helps toast the spices and really brings out their flavor.
- Pour in the beef broth. Give everything a good stir to combine. Bring the mixture to a simmer, then reduce the heat to low. Let it cook for about 5-7 minutes, or until most of the liquid has reduced and the filling looks nice and saucy, but not watery. Season it generously with salt and pepper to taste. Give it a little taste test here! Remove the skillet from the heat for now.
- Now for the quesadilla assembly and cooking! Wipe out a large non-stick skillet (or use a different one if you prefer) and heat the olive oil over medium heat. Place one flour tortilla flat in the hot skillet.
- Sprinkle about 1/4 cup of the shredded cheddar cheese evenly over just one half of the tortilla. Next, spoon about 1/4 to 1/3 cup of your delicious seasoned ground beef mixture over the cheese on that same half. Finish with another sprinkle of cheese on top of the meat.
- Carefully fold the empty half of the tortilla over the filling. Use a spatula to gently press down on the quesadilla. Cook for 3-5 minutes per side, until the tortilla is golden brown and crispy, and you can see the cheese getting all wonderfully melted and gooey inside. I like to check often after about 3 minutes to make sure it’s not browning too fast – medium heat is key to letting the cheese melt before the tortilla burns!
- Carefully slide the cooked quesadilla onto a cutting board. Use a sharp knife or a pizza cutter to slice it into wedges.
- Repeat steps 5 through 8 with the remaining tortillas and filling until you have a beautiful stack of cheesy ground beef quesadillas ready to devour!
Substitutions & Additions
This recipe is super versatile! Feel free to play around and make it your own.
- Swap the Meat: Not feeling beef? You can easily use ground turkey or ground chicken instead. For a vegetarian option, try using black beans (mashed slightly with a fork) or a mix of black beans and corn seasoned with the same spices.
- Change the Cheese: While cheddar is classic and amazing, Monterey Jack, Colby Jack, Pepper Jack (for a little extra heat!), or a Mexican blend would all work wonderfully.
- Add Veggies to the Filling: Before adding the tomato paste and spices, you could sauté finely diced bell peppers, corn, or mushrooms along with the onions.
- Load up on Toppings: This is where the real fun can begin! Serve your quesadillas with sour cream, salsa, guacamole, pico de gallo, a dollop of plain Greek yogurt, chopped cilantro, or pickled jalapeños.
Tips for Success
A few little pointers to make sure your quesadillas turn out perfect every time:
- Don’t Overfill: It’s tempting to pile on the filling, but too much will make it hard to fold and will likely ooze out while cooking. Stick to the recommended amount.
- Medium Heat is Your Friend: Cooking over medium heat gives the cheese time to melt and the filling to heat through before the outside gets too dark or burns. Be patient!
- Drain the Beef Well: Lingering grease can make your quesadillas greasy. Make sure you drain off as much as possible after browning the meat.
- Use a Good Non-Stick Skillet: This makes flipping and removing the quesadillas so much easier!
- Make the Filling Ahead: The ground beef filling can be made a day or two in advance and stored in the fridge. Just reheat it gently before assembling the quesadillas. This makes the final assembly step even faster!
How to Store It
Got leftovers? Lucky you!
Store cooked and cooled quesadillas in an airtight container in the refrigerator for up to 3-4 days.
To reheat, the best way to get that crispy texture back is to warm them in a dry skillet over medium heat for a few minutes per side until heated through and crispy again. The microwave works for speed, but you’ll lose that lovely crispiness.
FAQs
Got questions? I’ve got answers!
Q: Can I make the meat filling spicier?
A: Absolutely! Increase the amount of cayenne pepper, add a pinch of red pepper flakes, or stir in a little hot sauce with the beef broth.
Q: Can I freeze these quesadillas?
A: You can! It’s best to cook them first, let them cool completely, then wrap them tightly in plastic wrap and foil or place in a freezer-safe bag. Reheat from frozen in a skillet (it will take longer) or in the oven until heated through and crispy.
Q: What’s the best way to serve these?
A: Hot off the skillet, sliced into wedges! Serve them with your favorite toppings like salsa, sour cream, and guacamole, and maybe some rice and beans on the side for a full meal.
Q: My tortillas aren’t getting crispy, just soft. What am I doing wrong?
A: Make sure your skillet is properly heated to medium heat before adding the tortilla. Also, ensure you’re using a little bit of oil in the pan (or cooking spray) to help them crisp up. Don’t overcrowd the pan – cook them one at a time.
Alright friends, there you have it! A simple, flavorful, and utterly satisfying recipe for Ground Beef Cheesy Quesadillas. I just know you’re going to love making and eating these as much as I do. Happy cooking!
Easy Cheesy Ground Beef Quesadillas
Ingredients
Equipment
Method
- Step 1: Grab a large skillet and heat it over medium-high heat. Add your ground beef and cook, breaking it up into crumbles, until all browned. Drain off any excess grease.
- Step 2: Add the chopped onion into the same skillet with the beef. Cook for about 5-7 minutes until softened. Stir in minced garlic and cook for just one more minute.
- Step 3: Stir in the tomato paste, chili powder, cumin, smoked paprika, and cayenne pepper (if using). Cook this spice mixture for about 1 minute, stirring constantly.
- Step 4: Pour in the beef broth. Stir to combine. Bring the mixture to a simmer, then reduce heat to low. Cook for about 5-7 minutes, or until most liquid has reduced. Season generously with salt and pepper to taste. Remove from heat.
- Step 5: Wipe out a large non-stick skillet (or use a different one) and heat the olive oil over medium heat. Place one flour tortilla flat in the hot skillet.
- Step 6: Sprinkle about 1/4 cup of shredded cheddar cheese evenly over just one half of the tortilla. Spoon about 1/4 to 1/3 cup of the seasoned ground beef mixture over the cheese on that same half. Finish with another sprinkle of cheese on top of the meat.
- Step 7: Carefully fold the empty half of the tortilla over the filling. Gently press down with a spatula. Cook for 3-5 minutes per side, until the tortilla is golden brown and crispy, and the cheese is melted and gooey.
- Step 8: Carefully slide the cooked quesadilla onto a cutting board. Slice into wedges with a sharp knife or pizza cutter.
- Step 9: Repeat steps 5 through 8 with the remaining tortillas and filling until all quesadillas are cooked.