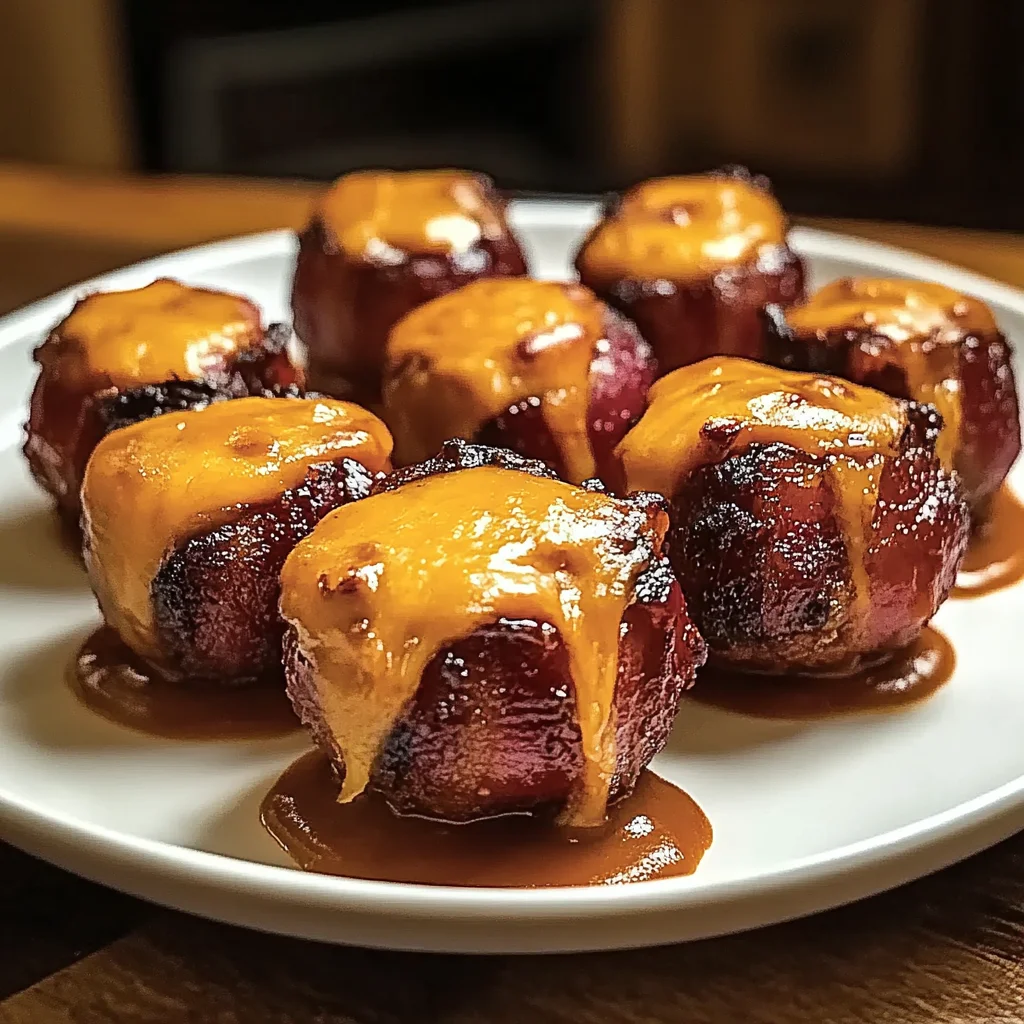
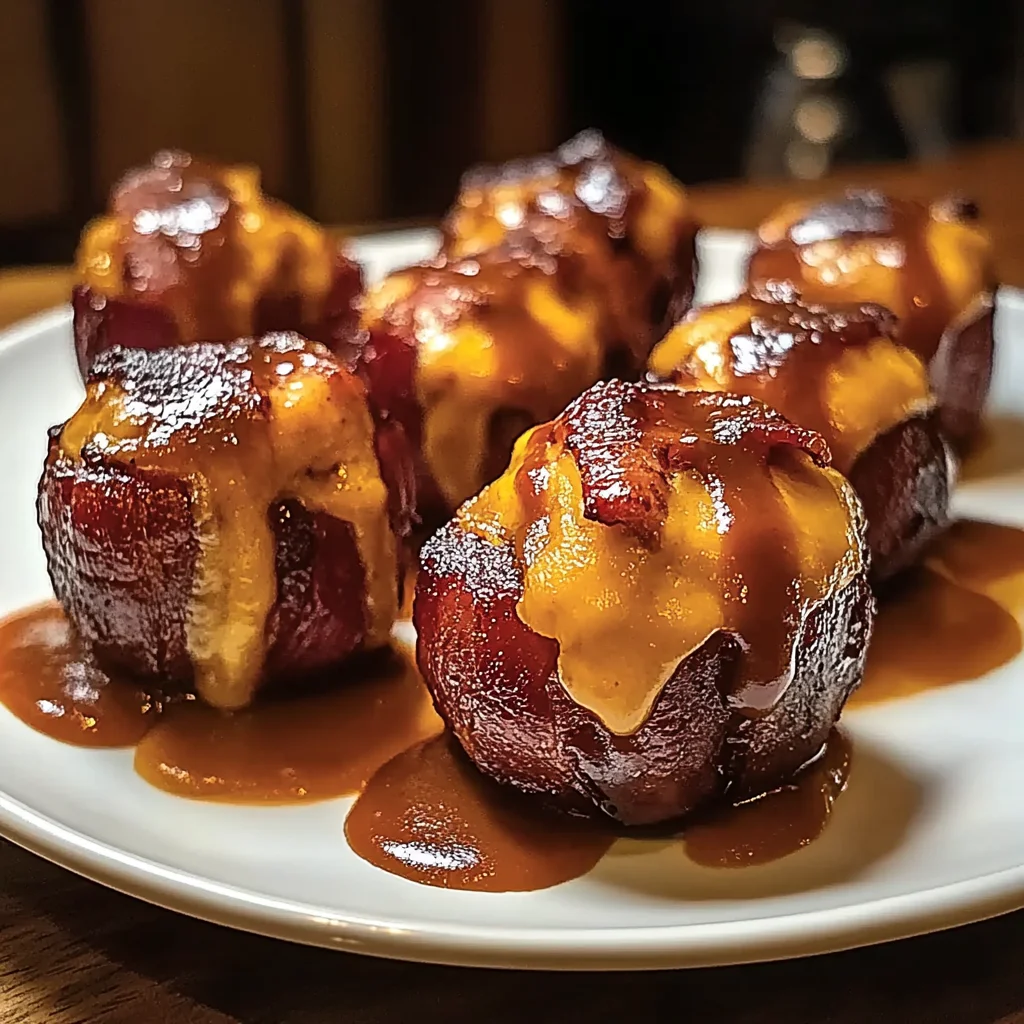
Remember those amazing little bites at parties that just disappeared the second they hit the table? The ones everyone was talking about? Well, get ready, because you’re about to become THAT person! These Cheddar-Stuffed BBQ Bacon Bombs are seriously easy to make, incredibly fun to eat, and pack a punch of flavor that’s pure comfort food heaven. Think juicy meatball, gooey cheddar, crispy bacon, all coated in sticky, smoky BBQ sauce. Trust me, these are memorable!
Why You’ll Love This Recipe
- Fast
- Easy
- Giftable
- Crowd-pleasing
Ingredients
Gather ’round, kitchen friends! Here’s what you’ll need to whip up a batch of these bad boys. Most of these are probably already hanging out in your pantry and fridge!
- 1 lb ground beef or ground pork: Or a mix! I love a little blend for extra flavor, but use what you have on hand.
- 4 oz cheddar cheese, cubed: Sharp cheddar works beautifully, but any cheddar you love will do. Just cube it up so it’s ready to be nestled inside.
- 12 slices thin-cut bacon: Thin cut wraps easier and gets crispier faster.
- 1/2 cup BBQ sauce: Your favorite kind! Smoky, sweet, tangy – whatever makes your taste buds happy.
- 1 teaspoon garlic powder: Adds that essential savory kick.
- 1 teaspoon onion powder: Garlic’s best friend, bringing more depth.
- 1 tablespoon Worcestershire sauce: This is a little secret weapon for adding incredible umami flavor to the meat.
- 1/2 teaspoon salt: Just enough to season the meat.
- 1/2 teaspoon black pepper: Freshly ground if you have it!
- 1 tablespoon brown sugar (optional): If you like your BBQ glaze extra sticky and sweet, a little sprinkle of brown sugar before baking is divine. Totally optional, but oh so good!
- Toothpicks: You’ll need these to hold the bacon in place while baking. Don’t forget to count them!
How to Make It
Alright, let’s get cooking! You won’t believe how simple these are to assemble. Think of it like a fun kitchen craft project!
Step 1: Prep Your Station. Preheat your oven to 375°F (190°C). Line a baking sheet with foil. This is key for easy cleanup later – trust me on this!
Step 2: Season the Meat. In a medium mixing bowl, combine the ground meat (beef, pork, or your mix) with the Worcestershire sauce, garlic powder, onion powder, salt, and black pepper. Get in there with your hands (it’s the best way!) and mix everything together until just combined. Don’t overmix, or your bombs might be tough.
Step 3: Stuff and Roll. Now for the fun part! Grab a small amount of the meat mixture – maybe about 1.5 to 2 tablespoons. Flatten it gently in the palm of your hand. Place a cube of that lovely cheddar right in the center. Carefully shape the meat around the cheese, sealing it completely, to form a neat little meatball. Repeat this process with the remaining meat and cheese cubes until you have a tray of cheese-stuffed meatballs.
Step 4: Wrap it Up! Take a slice of your thin-cut bacon. Starting at one end, wrap it tightly around a meatball, making sure the bacon covers as much surface area as possible. Secure the end of the bacon slice with a toothpick, pushing it through the bacon and meatball to hold it snuggly in place. Do this for all the meatballs.
Step 5: The First Glaze. Arrange the bacon-wrapped meatballs on your prepared baking sheet. Using a brush, generously coat each one with your favorite BBQ sauce. If you’re using the optional brown sugar, sprinkle or gently brush a little over the sauced bombs now.
Step 6: Bake Time! Pop the baking sheet into your preheated oven. Bake for 25-30 minutes. About halfway through (around 12-15 minutes), carefully pull the tray out and brush them with more BBQ sauce. This builds up that beautiful, sticky glaze!
Step 7: Crispy Finish (Optional but Recommended!). If you want that bacon extra crispy (and who doesn’t?!), you can carefully broil them for an additional 2-3 minutes. Keep a very close eye on them during this step – broilers are powerful and they can go from perfect to burnt quickly!
Step 8: Serve ‘Em Hot! Let the bacon bombs cool on the tray for just a few minutes. Remember those toothpicks? This is the crucial moment to carefully remove them before serving. Serve these beauties hot and watch them disappear!
Substitutions & Additions
Want to play around with the recipe? Go for it! Here are a few ideas:
- Cheese Swap: Monterey Jack, pepper jack (for a little heat!), or even a smoked gouda would be delicious inside.
- Meat Blend: Try a mix of ground beef and Italian sausage for extra flavor.
- Spicy Kick: Add a pinch of cayenne pepper or red pepper flakes to the meat mixture. Or use a spicy BBQ sauce!
- Different Sauce: Not feeling BBQ? Try a teriyaki glaze or even just a simple sweet and sour sauce.
- Herb It Up: Mix some finely chopped fresh parsley or chives into the meat mixture.
Tips for Success
Just a few little pointers to make sure your bombs are the bomb-diggity:
- Meatball Size Matters: Try to make your meatballs roughly the same size so they cook evenly. Too big and the bacon might burn before the meat is cooked through.
- Seal the Cheese: Make sure the meat completely surrounds the cheese cube. You don’t want any cheesy leaks while baking!
- Bacon Placement: Using thin-cut bacon makes it easier to wrap tightly. Secure it well with the toothpick so it doesn’t unravel.
- Don’t Skip the Foil: Seriously, line that baking sheet. It saves you so much scrubbing later!
- Broil with Caution: If you broil, stay right there and watch them. It’s just for a quick crisp, not extended cooking.
How to Store It
Got leftovers? (Highly unlikely, but just in case!)
Let them cool completely. Store any leftover Cheddar-Stuffed BBQ Bacon Bombs in an airtight container in the refrigerator for up to 3-4 days. To reheat, pop them back in a preheated oven (around 350°F) or an air fryer until warmed through. Microwaving works in a pinch, but the bacon won’t be as crispy.
FAQs
Here are a few questions you might have:
Q: Can I make these ahead of time?
A: You can assemble them up to the point of baking (steps 1-5, without the second glaze). Store them covered in the fridge. When ready to bake, add a few extra minutes to the initial baking time as they’ll be cold.
Q: Can I cook these in an air fryer?
A: Yes! Place them in a single layer in your air fryer basket (you’ll likely need to cook in batches). Cook at 375°F (190°C) for about 12-18 minutes, flipping halfway through and brushing with BBQ sauce during the last few minutes, until cooked through and the bacon is crispy.
Q: Why isn’t my bacon getting crispy?
A: Make sure you’re using thin-cut bacon. Also, overcrowding the pan can steam the bacon instead of crisping it. Ensure there’s a little space between each bomb on the baking sheet. Don’t skip the broiling step if you want extra crispiness!
Easy Cheesy BBQ Bacon Bombs
Ingredients
Equipment
Method
- Step 1: Prep Your Station. Preheat your oven to 375°F (190°C). Line a baking sheet with foil.
- Step 2: Season the Meat. In a medium mixing bowl, combine the ground meat with the Worcestershire sauce, garlic powder, onion powder, salt, and black pepper. Mix everything together until just combined (do not overmix).
- Step 3: Stuff and Roll. Grab about 1.5 to 2 tablespoons of the meat mixture, flatten it, place a cube of cheddar in the center, and shape the meat around the cheese to form a meatball. Repeat for all meatballs.
- Step 4: Wrap it Up! Wrap a slice of thin-cut bacon tightly around each meatball. Secure the end of the bacon slice with a toothpick, pushing it through the bacon and meatball.
- Step 5: The First Glaze. Arrange the bacon-wrapped meatballs on your prepared baking sheet. Generously coat each one with your favorite BBQ sauce using a brush. If using optional brown sugar, sprinkle or gently brush a little over the sauced bombs.
- Step 6: Bake Time! Bake for 25-30 minutes at 375°F (190°C). About halfway through (around 12-15 minutes), brush them with more BBQ sauce.
- Step 7: Crispy Finish (Optional but Recommended!). For extra crispy bacon, carefully broil them for an additional 2-3 minutes, watching them closely to prevent burning.
- Step 8: Serve 'Em Hot! Let the bacon bombs cool on the tray for just a few minutes. Carefully remove the toothpicks before serving. Serve hot.