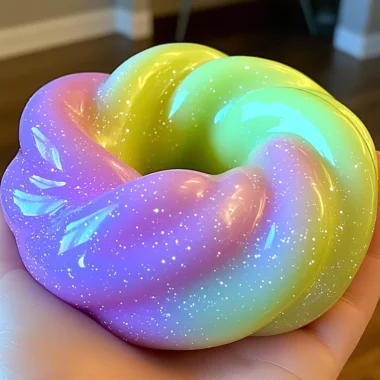
Oh, friends! Do you remember the magic of making slime as a kid? Or maybe you’re on the journey now with your own little ones (or even just for fun yourself, no judgment here!). There’s just something so wonderfully squishy, stretchy, and utterly satisfying about a good batch of slime. And guess what? It doesn’t have to be complicated! Forget those recipes with a gazillion ingredients you can’t pronounce. This recipe? It’s the one you’ve been waiting for. Just THREE simple ingredients and a few minutes stand between you and a glorious, stretchy, fluffy masterpiece. It’s the perfect rainy day activity, a fantastic party favor, or just a fun way to de-stress (seriously!).
Why You’ll Love This Recipe
- Fast: Seriously, we’re talking minutes, not hours.
- Easy: If you can stir, you can make this slime.
- Giftable: Whip up a batch, tie it with a ribbon, and you’ve got a fun little gift!
- Crowd-pleasing: Kids AND adults love to play with this stuff!
Ingredients
Gathering your ingredients is half the fun! Here’s what you’ll need for this magical mix:
- 8 oz (227g) white school glue: Like the classic Elmer’s white glue you probably used in school! Make sure it’s PVA glue.
- 1 tbsp (15ml) baking soda: Just the stuff you keep in your pantry for baking or deodorizing.
- 1 ½ – 2 tbsp (22.5ml – 30ml) contact lens saline solution (containing boric acid or sodium borate): This is your slime activator! Look for a solution that specifically lists boric acid or sodium borate in the ingredients. This is key to making the magic happen!
- Food coloring (optional): Want to add some vibrant color? Grab your favorite shades!
How to Make It
Alright, let’s get our hands (eventually!) messy! Follow these simple steps:
- First things first, protect your workspace! I always cover my table with a plastic tablecloth or even just an old trash bag cut open. It makes cleanup a breeze later!
- Grab a plastic bowl – something you don’t mind getting glue in. Pour the entire 8 oz bottle of white school glue into the bowl. If you’re using food coloring, now’s the time to add a few drops! Start small, you can always add more. Mix it thoroughly with a spoon until you have a beautiful, even color.
- Add the 1 tablespoon of baking soda to the glue mixture. Stir, stir, stir! Make sure the baking soda is completely dissolved and combined with the glue. It might look a little clumpy at first, but keep going until it’s smooth.
- Now for the exciting part – adding the activator! Gradually add 1 ½ tablespoons of your contact lens saline solution. Add about half of it first, and mix continuously with your spoon. You’ll notice the mixture starting to thicken almost immediately. It will begin to pull away from the sides of the bowl.
- As the mixture gets thicker and thicker, it will become hard to stir with a spoon. This is your cue! Put the spoon down and get your clean hands in there. Knead the slime directly in the bowl. It will be super sticky at first, this is totally normal! Don’t panic! Just keep folding it over on itself and squishing it. After about 5 minutes of kneading, the stickiness will subside, and it will start to firm up into that perfect, stretchy slime consistency.
- If after 5 minutes of kneading, your slime is still too sticky for your liking, you can add a little more saline solution. Add just ½ tablespoon at a time, and knead it in completely before deciding if you need more. Be careful not to add too much, or your slime can become too hard and break easily.
- Ta-da! You’ve made slime! Now go stretch it, poke it, and have some fun!

Substitutions & Additions
This basic recipe is fantastic on its own, but it’s also a perfect base for getting creative! Here are some ideas:
- Make it Sparkle: Stir in some glitter with the glue before adding the baking soda. Fine glitter works best!
- Get Floaty: Add small foam beads (like those used in beanbag chairs) after the slime has mostly formed but is still a little sticky. Knead them in carefully.
- Try Different Colors: Mix food coloring to create custom shades, or try neon or gel food coloring for extra vibrancy.
- Add Scent: A drop or two of kid-safe essential oil or a few drops of extract (like vanilla or peppermint) can add a fun sensory element.
- Vary the Activator: While this recipe uses saline solution, you can experiment (carefully!) with other activators like liquid starch or Borax solution, but the ratios will be different. This saline recipe is one of the easiest and most reliable, though!
Tips for Success
Making slime is usually smooth sailing, but here are a few little tips I’ve picked up along the way to help you avoid common hiccups:
- Check Your Activator: This is crucial! Your contact lens solution MUST contain boric acid or sodium borate to activate the glue. If it doesn’t, it won’t work. Check the ingredients list!
- Kneading is Key: Don’t skip the kneading step! That 5 minutes of working the slime with your hands is essential for getting rid of the initial stickiness and developing that perfect texture.
- Add Activator Gradually: It’s much easier to fix slime that’s too sticky (by adding a tiny bit more saline) than slime that’s too hard (which is tough to fix!). Add the saline solution slowly and mix well before deciding if you need more.
- Protect Your Surfaces: Seriously, put down that tablecloth! It saves so much scrubbing later.
- Wash Hands Promptly: While the ingredients are generally safe for crafts, it’s always a good idea to wash hands thoroughly after playing with slime.
How to Store It
You’ve made this amazing slime, now you want it to last! Proper storage is key.
The best way to store your homemade slime is in an airtight container or a heavy-duty zip-top bag. Make sure all the air is squeezed out before sealing. Keeping it sealed prevents the air from getting to it, which is what causes it to dry out and lose its stretchiness over time. Stored correctly, your slime can last for a week or two of intermittent play. If it starts to feel a little less stretchy, you can sometimes revive it by kneading in a tiny drop of water or lotion, but be careful not to add too much!
FAQs
Got questions? Here are a few common ones:
Why is my slime too sticky?
This usually means you need a little more activator. Go back to step 6 and knead in just a tiny bit more contact lens solution (like ¼ to ½ a tablespoon at a time) until it reaches your desired consistency. Make sure you’re kneading thoroughly after each addition!
Why is my slime too hard or breaking apart?
You likely added too much activator. Unfortunately, this is harder to fix. You can try kneading in a tiny amount of warm water or lotion, but sometimes you just have to start over. This is why adding the saline solution gradually is so important!
Is this slime safe for kids?
The ingredients used (PVA glue, baking soda, saline solution with boric acid) are common in many craft and household products. However, slime is NOT edible and should never be consumed. It’s best made and played with under adult supervision, especially with younger children who might be tempted to put it in their mouths. Ensure hands are washed after playing.
Can I use glitter glue instead of white glue?
Yes! You can absolutely use glitter glue or even colored glue. The process is the same, you just skip adding the food coloring in step 2.

Easy Peasy 3-Ingredient Fluffy Slime
Ingredients
Equipment
Method
- Step 1: Protect your workspace with a plastic tablecloth or cover.
- Step 2: Pour the entire 8 oz bottle of white school glue into a plastic bowl. If using food coloring, add a few drops now and mix thoroughly with a spoon until the color is even.
- Step 3: Add the 1 tablespoon of baking soda to the glue mixture. Stir thoroughly until the baking soda is completely dissolved and combined with the glue.
- Step 4: Gradually add 1 ½ tablespoons of the contact lens saline solution. Add about half first and mix continuously with your spoon. The mixture will start to thicken and pull away from the sides of the bowl.
- Step 5: As the mixture becomes hard to stir, put the spoon down and begin kneading the slime with your clean hands directly in the bowl. It will be sticky at first, but keep folding and squishing for about 5 minutes until the stickiness subsides and it reaches a stretchy consistency.
- Step 6: If after 5 minutes of kneading the slime is still too sticky, add a little more saline solution, about ½ tablespoon at a time, and knead completely before adding more. Be careful not to add too much, or the slime can become too hard.
- Step 7: Your slime is ready! Stretch it, poke it, and enjoy.