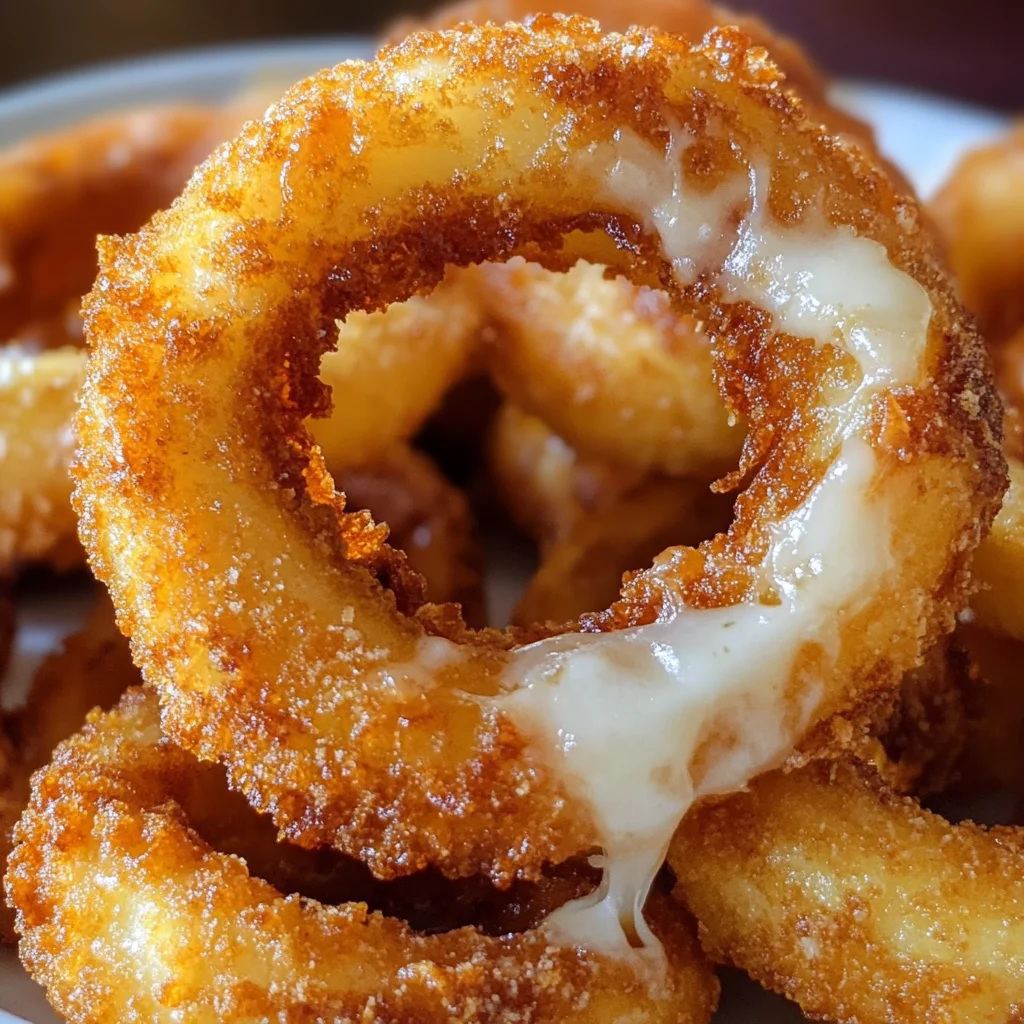
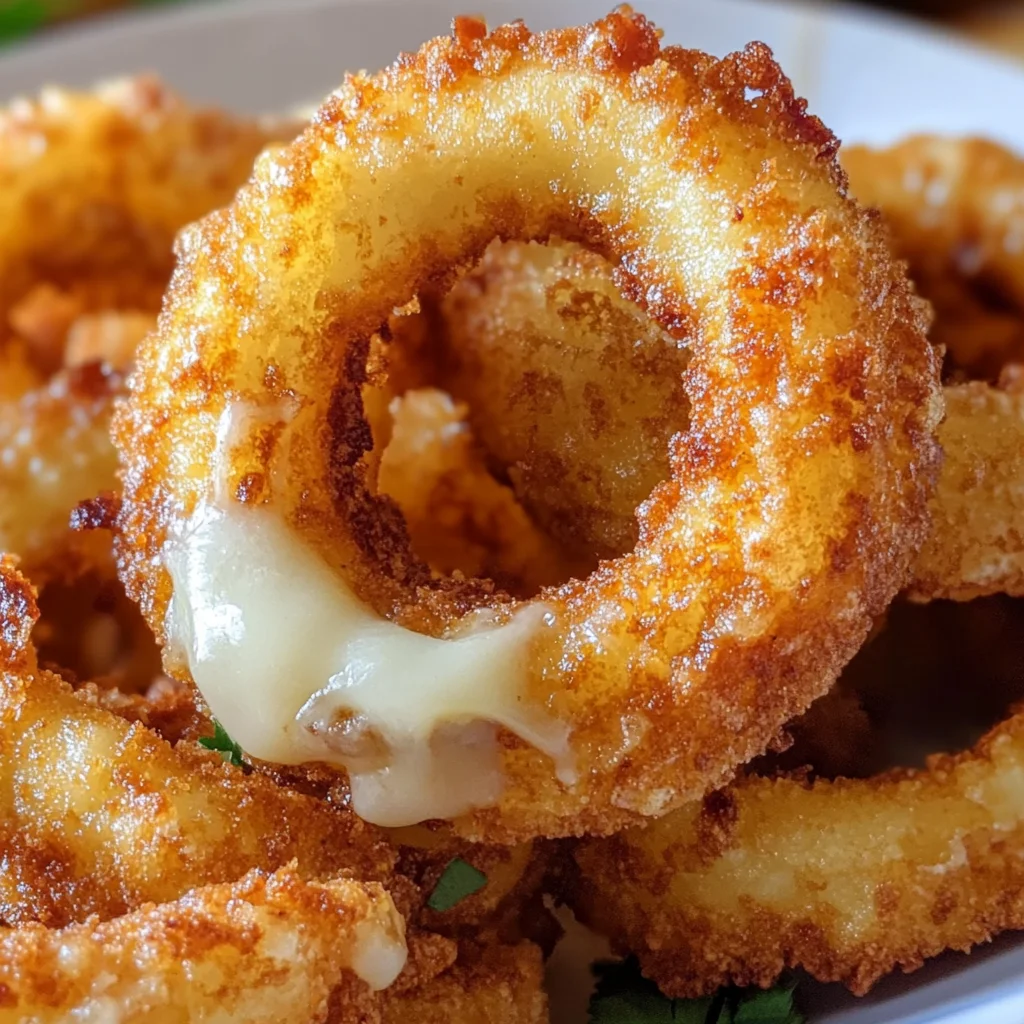
Remember those Friday nights growing up, when the aroma of something delicious frying filled the kitchen? This recipe brings back that cozy feeling with a fun twist! These cheesy onion rings are ridiculously easy to make, unbelievably tasty, and guaranteed to be a crowd-pleaser – perfect for game day, movie night, or just a fun weeknight dinner.
Why You’ll Love This Recipe
- Fast: Ready in under an hour!
- Easy: Even beginner cooks can master this.
- Giftable: Perfect for potlucks and parties!
- Crowd-pleasing: Everyone loves cheesy, crispy goodness.
Ingredients
- 1 large sweet onion, sliced into thick rings (about ½ inch): Sweet onions are milder and caramelize beautifully. You can use yellow onions, but they might be a bit sharper.
- 8 mozzarella sticks: These melt beautifully and create that amazing cheesy pull.
- 1 cup all-purpose flour: For the classic breading base.
- 2 large eggs: Helps bind the breadcrumbs.
- 2 tablespoons milk: Adds moisture and helps create a smoother batter.
- 1½ cups seasoned breadcrumbs or panko: Panko creates extra-crispy rings!
- ½ teaspoon garlic powder: Adds a savory kick.
- ½ teaspoon paprika: For a hint of smoky sweetness and color.
- Salt and pepper, to taste: Season to your liking!
- Vegetable oil, for frying: Enough to fill your pot about 2 inches deep.
How to Make It
Let’s get cooking! This recipe is super straightforward.
- Slice your onion into thick rings (about ½ inch) and pair up similar-sized rings. I like to make sure they’re relatively even so they cook consistently. Gently place a mozzarella stick between each onion ring pair.
- Set up your breading station: Place flour in one bowl, whisk eggs and milk together in another, and combine breadcrumbs, garlic powder, paprika, salt, and pepper in a third bowl.
- Dredge each onion ring in the flour, shaking off any excess. Then dip it in the egg mixture, letting any excess drip off, and finally coat completely in the breadcrumbs. For extra-crispy rings, I repeat the egg and breadcrumb steps – it’s worth it!
- Chill those breaded rings in the fridge for 20-30 minutes. This helps the breading set and prevents it from falling off during frying.
- Heat your vegetable oil in a large pot to 350°F (175°C). Use a thermometer to ensure it’s at the right temperature. Fry the onion rings in batches, for about 2-3 minutes per side, until they’re golden brown and crispy. Don’t overcrowd the pot!
- Remove the onion rings from the oil and place them on a wire rack or paper towels to drain excess oil.
- Serve immediately and enjoy the warm, cheesy, crispy goodness!
Substitutions & Additions
Feel free to get creative!
- Cheese Swap: Try provolone, pepper jack, or even a blend of cheeses for a different flavor profile.
- Spice it up: Add a pinch of cayenne pepper or some chopped jalapeños to the breading for a spicy kick.
- Herb Infusion: Incorporate some dried herbs like oregano or thyme into the breading for an extra layer of flavor.
- Dipping Sauces: Serve with your favorite dipping sauces like ranch, marinara, or a spicy mayo.
Tips for Success
- Don’t overcrowd the pan: Fry in batches to ensure even cooking and prevent the oil temperature from dropping too much.
- Use a thermometer: Maintaining the correct oil temperature is key to perfectly crispy onion rings.
- Chill the rings: Chilling helps the breading adhere better and prevents it from falling off during frying.
- Prep Ahead: You can bread the onion rings up to a day in advance and store them in the refrigerator. Just fry them when you’re ready!
How to Store It
Leftover onion rings are best enjoyed fresh, but if you have some leftovers, store them in an airtight container at room temperature for up to 2 days, or in the refrigerator for up to 3 days. Reheat in a 350°F (175°C) oven for a few minutes to crisp them back up.
FAQs
- Q: Can I bake these instead of frying? A: While frying produces the crispiest results, you can bake them at 400°F (200°C) for about 20-25 minutes, flipping halfway through. They won’t be quite as crispy, though.
- Q: What if my mozzarella sticks are too long? A: Simply cut them to size to fit between your onion rings.
- Q: Can I use different types of onions? A: Yes, but sweet onions are best for their mild flavor and ability to caramelize nicely.
- Q: How long can I keep the breaded onion rings before frying? A: You can bread the onion rings up to 24 hours in advance and store them in the refrigerator.

Crispy Cheesy Onion Rings
These cheesy onion rings are ridiculously easy to make, unbelievably tasty, and guaranteed to be a crowd-pleaser – perfect for game day, movie night, or just a fun weeknight dinner.
Ingredients
Equipment
Method
- Slice your onion into thick rings (about ½ inch) and pair up similar-sized rings. Gently place a mozzarella stick between each onion ring pair.
- Set up your breading station: Place flour in one bowl, whisk eggs and milk together in another, and combine breadcrumbs, garlic powder, paprika, salt, and pepper in a third bowl.
- Dredge each onion ring in the flour, shaking off any excess. Then dip it in the egg mixture, letting any excess drip off, and finally coat completely in the breadcrumbs. For extra-crispy rings, repeat the egg and breadcrumb steps.
- Chill those breaded rings in the fridge for 20-30 minutes. This helps the breading set and prevents it from falling off during frying.
- Heat your vegetable oil in a large pot to 350°F (175°C). Use a thermometer to ensure it's at the right temperature. Fry the onion rings in batches, for about 2-3 minutes per side, until they’re golden brown and crispy. Don't overcrowd the pot!
- Remove the onion rings from the oil and place them on a wire rack or paper towels to drain excess oil.
- Serve immediately and enjoy the warm, cheesy, crispy goodness!
Notes
Feel free to get creative! Try different cheeses, add spices or herbs, and serve with your favorite dipping sauces.