Introduction
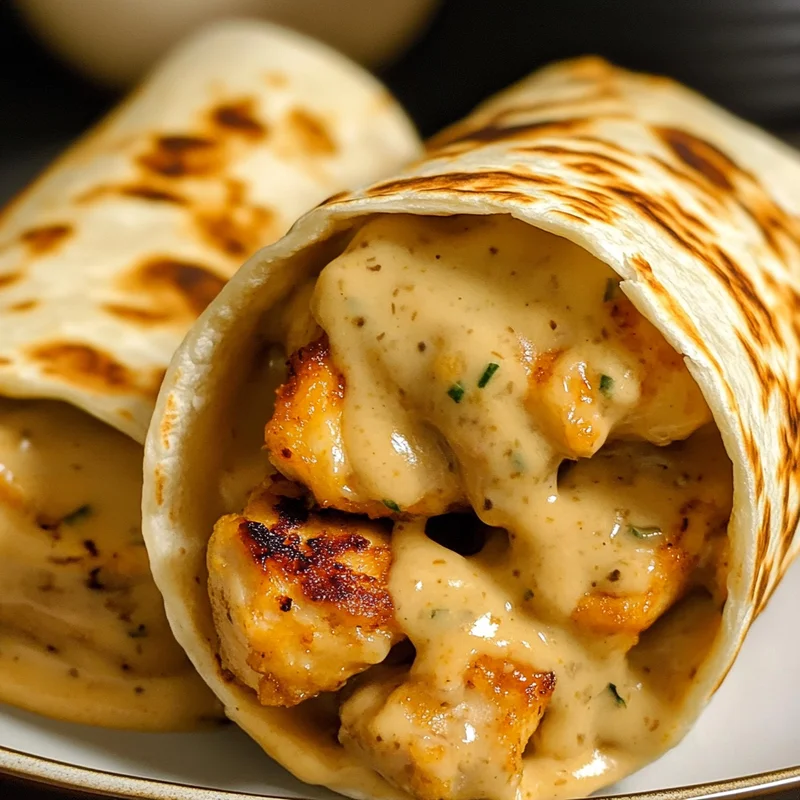
Oh hey there, friend! Come on in, grab a comfy seat. I want to tell you about a little kitchen magic that happens when you combine cheesy goodness, savory garlic, and tender chicken, all wrapped up in a perfectly toasted tortilla. Remember those quick, satisfying meals that just hit the spot after a long day? This Cheesy Garlic Chicken Wrap is exactly that. It feels like comfort food but is surprisingly quick and simple to whip up. Whether you’re looking for a lightning-fast lunch, a casual dinner, or something seriously yummy to munch on while watching your favorite show, these wraps have got your back. Trust me, once you try them, they’ll be on repeat in your kitchen!
Why You’ll Love This Recipe
- Quick: Seriously, we’re talking maybe 15-20 minutes from start to finish, especially if you’ve got cooked chicken ready.
- Easy: If you can stir and roll, you can make these. No fancy techniques required!
- Perfect as a gift (or a shareable treat): While maybe not a traditional gift, bringing a batch of these to a potluck or friend’s house will earn you major points.
- Crowd-pleaser: Who doesn’t love cheesy, garlicky chicken wrapped in a crispy tortilla? Kids and adults alike devour these!
Ingredients
Here’s what you’ll need to gather. Most of these are probably already hanging out in your fridge and pantry!
- 2 cups cooked chicken, shredded or diced: This is a fantastic way to use up leftover rotisserie chicken or chicken breasts you cooked earlier in the week.
- 1½ cups mozzarella or cheddar cheese: Or a mix of both! Use your favorite melty cheese here. Monterey Jack or a Colby Jack blend would be amazing too.
- ¼ cup cream cheese, softened: This is the secret weapon for ultimate creaminess. Make sure it’s soft so it mixes smoothly.
- 1 tablespoon mayonnaise or sour cream: Adds a little tang and helps bind everything together beautifully. Use whichever you prefer!
- 1 teaspoon garlic powder: Gives us that essential garlic flavor without the fuss of fresh garlic.
- ½ teaspoon onion powder: A perfect partner to the garlic powder, adding depth of flavor.
- Salt and pepper to taste: Start with a pinch and add more after mixing, tasting as you go.
- 4 large flour tortillas: Look for the “burrito size” ones, they hold the filling best.
- Butter or oil for grilling: For getting that gorgeous golden crust on the outside.
- Optional extras: Chopped fresh parsley for brightness, a dash of hot sauce for heat, or sliced jalapeños if you like a kick!
How to Make It
Let’s get cooking! It’s super straightforward, I promise.
- Okay, first things first, grab a mixing bowl. Toss in your cooked chicken, the glorious shredded cheese (whichever kind you chose!), the softened cream cheese, your mayo or sour cream, garlic powder, onion powder, and a little pinch of salt and pepper to start.
- Now, get in there and mix it all up! You want everything nicely combined and the cream cheese worked in so it’s one happy, cheesy chicken filling.
- Lay your large flour tortillas out flat. Spoon about a quarter of the mixture right into the center of each tortilla. Don’t overfill them, or they’ll be tricky to roll (learn from my early wrap fails!).
- To roll them up, first fold the sides of the tortilla in over the filling, then roll tightly from the bottom edge upwards into a neat wrap. It helps to keep the filling tucked in as you roll.
- Heat up your skillet or griddle over medium heat. Add a little butter or oil – enough to lightly coat the surface.
- Carefully place your wraps onto the hot skillet, seam-side down first. This helps seal them! Cook for about 2 to 3 minutes per side, or until they are beautifully golden brown and crispy. You’ll see those little toasted spots appear, which is exactly what you want.
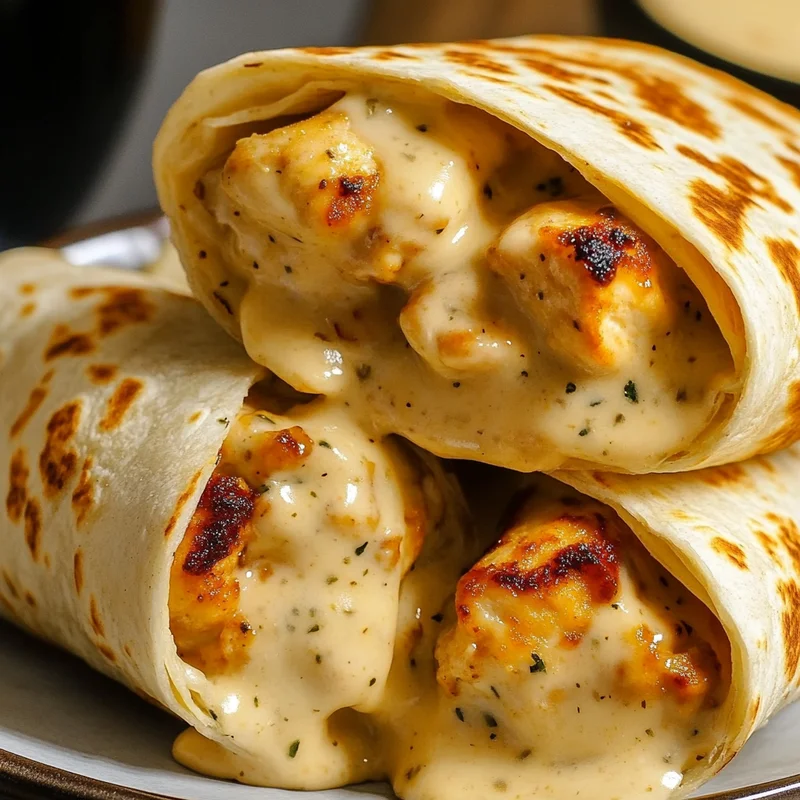
- Once they’re golden on all sides, take them off the heat. I like to slice them in half diagonally – it makes them easier to eat and looks nice too! Serve them hot and enjoy that ooey-gooey, cheesy center.
Substitutions & Additions
This recipe is super flexible! Feel free to play around and make it your own.
- Protein Swap: Not feeling chicken? Try cooked, shredded turkey, canned tuna (drained well), or even cooked, crumbled plant-based chicken or firm tofu.
- Cheesy Adventures: Mix up the cheeses! Provolone, Gouda, or Pepper Jack would add different flavors.
- Veggie Boost: Finely chopped spinach, sautéed mushrooms, or diced bell peppers could be mixed into the filling. Just make sure they don’t add too much extra moisture.
- Spice it Up: Add a pinch of red pepper flakes to the filling, or drizzle sriracha inside before rolling.
- Herb Garden: Fresh chives or cilantro could be lovely stirred into the mix or sprinkled on top.
Tips for Success
A few little pointers I’ve picked up along the way to make sure your wraps turn out perfect every time:
- Soft Cream Cheese is Key: If your cream cheese is straight from the fridge, microwave it for about 15-20 seconds just to soften it up. It mixes so much better.
- Don’t Overfill: Seriously, less is more sometimes. An overstuffed wrap is harder to roll and more likely to explode cheesy goodness onto your pan (ask me how I know).
- Medium Heat is Your Friend: Too high, and the tortillas burn before the inside is heated through. Too low, and they won’t get crispy. Medium heat gets the job done right.
- Start Seam-Side Down: This little trick helps “glue” the wrap shut as it cooks, preventing unrolling disasters.
- Make Ahead? You can definitely make the filling mixture ahead of time and keep it in the fridge for a day or two. Just fill and cook the wraps when you’re ready to eat. I don’t recommend assembling and storing the uncooked wraps, as the tortillas can get soggy.
Storage Instructions
Got leftovers? (Highly unlikely, but just in case!)
Once cooled completely, store leftover wraps in an airtight container in the refrigerator for up to 3 days. To reheat, the best way is usually back in a skillet over medium heat to crisp up the outside again, or in a toaster oven. A microwave works in a pinch, but you’ll lose that lovely crispy texture.
FAQ
- Can I use fresh garlic instead of powder? Yes! Mince 1-2 cloves very finely and sauté them gently in a tiny bit of oil before adding to the chicken mixture. Or, you can add raw minced garlic, but be aware the flavor will be stronger.
- Can I bake these instead of pan-frying? You could! Place seam-side down on a baking sheet and bake at around 375°F (190°C) for 15-20 minutes, flipping halfway through, until golden and heated through. They might not be quite as crispy as pan-fried, though.
- What kind of chicken is best? Any cooked chicken works! Shredded rotisserie chicken is my go-to for ease, but boiled, baked, or pan-fried chicken breasts or thighs work perfectly once cooked and shredded or diced.
- Can I make these low-carb? You could try using low-carb tortillas! The filling itself is already pretty low-carb.

Easy Cheesy Garlic Chicken Wraps
Ingredients
Equipment
Method
- Grab a mixing bowl. Toss in your cooked chicken, the glorious shredded cheese, the softened cream cheese, your mayo or sour cream, garlic powder, onion powder, and a little pinch of salt and pepper to start.
- Now, get in there and mix it all up! You want everything nicely combined and the cream cheese worked in so it's one happy, cheesy chicken filling.
- Lay your large flour tortillas out flat. Spoon about a quarter of the mixture right into the center of each tortilla. Don't overfill them, or they'll be tricky to roll.
- To roll them up, first fold the sides of the tortilla in over the filling, then roll tightly from the bottom edge upwards into a neat wrap. It helps to keep the filling tucked in as you roll.
- Heat up your skillet or griddle over medium heat. Add a little butter or oil – enough to lightly coat the surface.
- Carefully place your wraps onto the hot skillet, seam-side down first. This helps seal them! Cook for about 2 to 3 minutes per side, or until they are beautifully golden brown and crispy. You'll see those little toasted spots appear, which is exactly what you want.
- Once they're golden on all sides, take them off the heat. I like to slice them in half diagonally – it makes them easier to eat and looks nice too! Serve them hot and enjoy that ooey-gooey, cheesy center.
Notes
- Protein Swap: Try cooked, shredded turkey, canned tuna (drained well), or cooked, crumbled plant-based chicken or firm tofu.
- Cheesy Adventures: Mix up the cheeses! Provolone, Gouda, or Pepper Jack would add different flavors.
- Veggie Boost: Finely chopped spinach, sautéed mushrooms, or diced bell peppers could be mixed into the filling (ensure they don't add too much moisture).
- Spice it Up: Add a pinch of red pepper flakes to the filling, or drizzle sriracha inside before rolling.
- Herb Garden: Fresh chives or cilantro could be lovely stirred into the mix or sprinkled on top. Tips for Success:
- Soft Cream Cheese is Key: Microwave cold cream cheese for 15-20 seconds to soften it for easier mixing.
- Don't Overfill: An overstuffed wrap is harder to roll and more likely to leak.
- Medium Heat is Your Friend: Too high heat burns tortillas; too low doesn't crisp them.
- Start Seam-Side Down: Helps seal the wrap while cooking.
- Make Ahead? The filling mixture can be made ahead (1-2 days in fridge). Assemble and cook wraps just before serving. Storage Instructions:
- Store cooled leftovers in an airtight container in the refrigerator for up to 3 days.
- Reheat in a skillet over medium heat (best for crispness) or a toaster oven. Microwave works but won't be crispy. FAQ:
- Fresh garlic: Mince 1-2 cloves finely and sauté before adding, or add raw minced garlic for a stronger flavor.
- Baking: Place seam-side down on a baking sheet, bake at 375°F (190°C) for 15-20 minutes, flipping halfway. Less crispy than pan-fried.
- Best chicken: Any cooked chicken works, shredded rotisserie is easy.
- Low-carb: Use low-carb tortillas.